

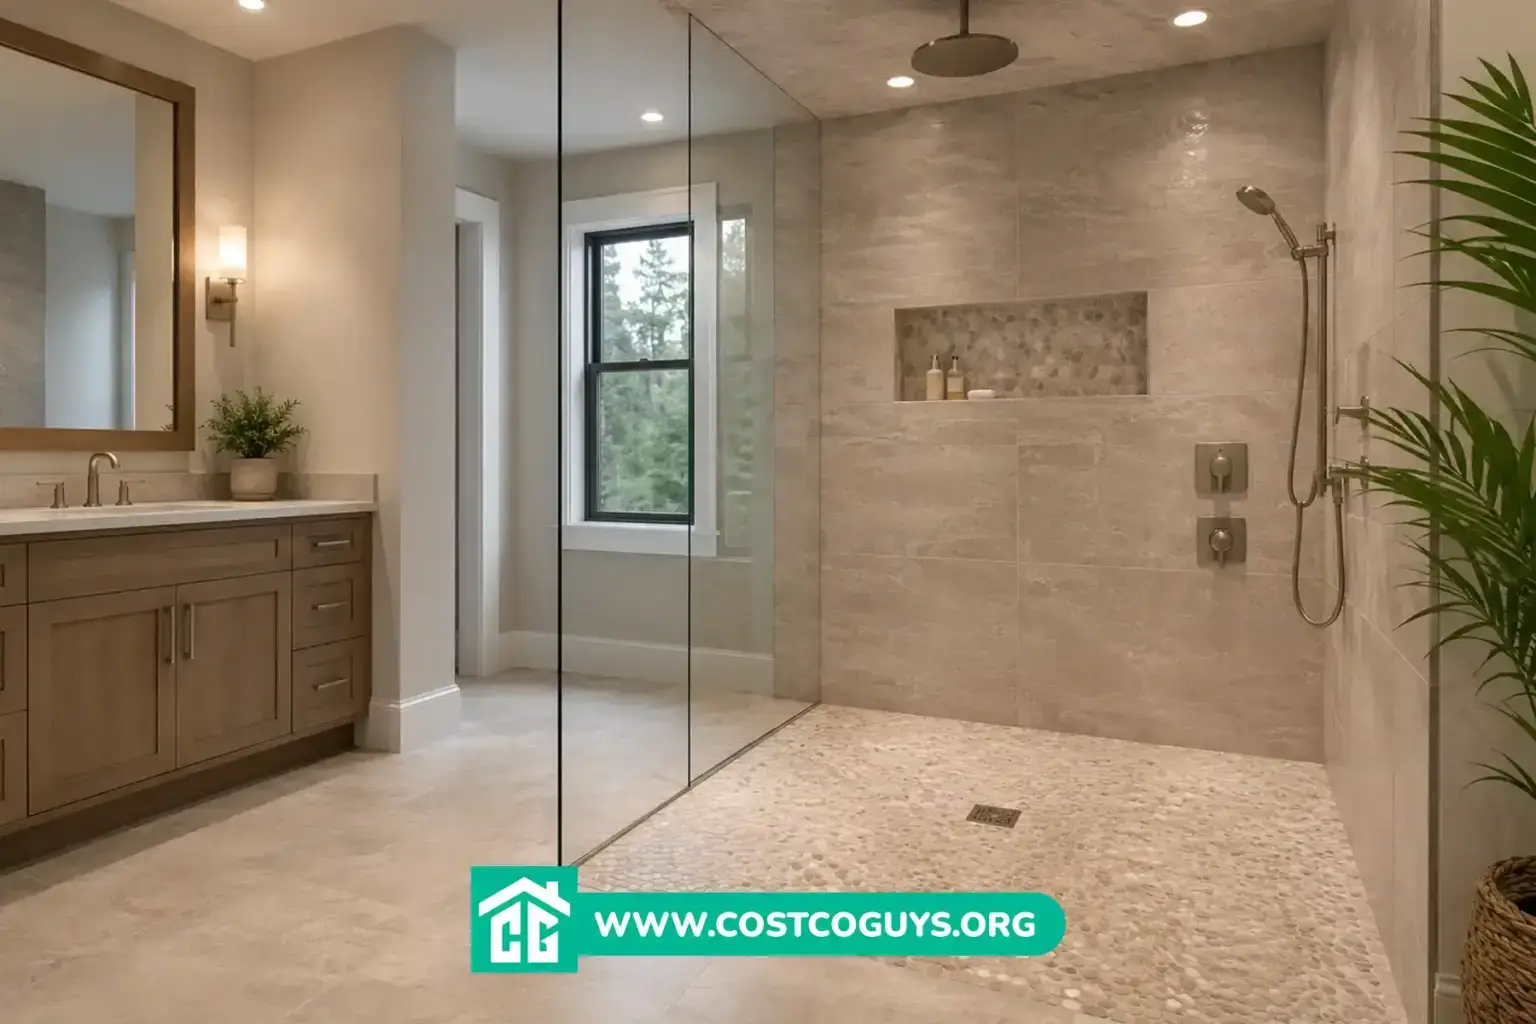

A custom curbless shower pan typically costs $900 to $2,500 for the base and drain alone, or $12,000 to $17,000 if you’re building an entire zero threshold shower from scratch in 2026. The final number depends on your shower size, the drain type you pick, and whether your contractor uses a foam tray system or builds a traditional mortar bed.
- What a Custom Curbless Shower Pan Actually Is
- Custom Curbless Shower Pan Cost Breakdown for 2026
- How We Calculated These Shower Pan Costs
- Foam Tray Pans vs Mortar Bed Pans: Which Costs Less
- Center Drains vs Linear Drains in a Curbless Shower
- Building a Curbless Shower Pan Step by Step
- Common Mistakes That Cause Curbless Shower Leaks
- When to Hire a Licensed Plumber or Tile Pro
- Is a Custom Curbless Shower Pan Worth the Cost
- Curbless Shower Pan Questions
What a Custom Curbless Shower Pan Actually Is
A curbless shower pan sits flush with the rest of your bathroom floor instead of behind a raised curb. Water stays inside the shower area because the pan slopes gently toward the drain rather than being contained by a physical barrier. Contractors sometimes call this a zero threshold or barrier free shower.
You need a custom pan whenever your shower doesn’t match a standard prefabricated size, like 32 by 32 inches or 36 by 36 inches. Odd angles, oversized walk-in layouts, and showers built into an existing footprint almost always require a custom base. The tradeoff is real freedom in design, since you can run the same tile from your bathroom floor straight into the shower with no visible break.
Aging in place and wheelchair access drive a lot of these projects. A curbless design lets someone roll a shower chair straight in, and it removes a trip hazard for anyone with mobility issues. That’s a major reason accessibility remodels and curbless showers show up together so often.
Custom Curbless Shower Pan Cost Breakdown for 2026
Pricing splits into two very different categories, and mixing them up is where most homeowners get confused. One number covers just the pan and drain. The other covers the entire curbless shower, including demolition, plumbing, waterproofing, tile, and a glass enclosure.
| Item or Service | Typical Cost Range | What Affects the Price |
|---|---|---|
| Foam tray pan and linear drain (materials only) | $600 to $1,200 | Tray size, drain length, brand choice |
| Custom pan labor (framing, slope, waterproofing) | $500 to $1,500 | Shower size, floor prep, drain relocation |
| Mortar bed custom pan (materials and labor combined) | $900 to $2,500, up to $4,600 for large or premium jobs | Pan material, tile choice, contractor rates |
| Full curbless shower renovation | $12,000 to $17,000 | Demolition, new plumbing, tile, glass, permits |
| Permits and inspection | $150 to $500 | Local building department fees |
Reported estimates from Angi put a custom shower pan around $2,500 on average, while their separate pan replacement data shows a wider $900 to $2,000 range depending on material. Homewyse lists a national average closer to $1,536 to $2,967 per pan for standard installation work. These numbers differ because Angi is quoting whole custom pan projects, while Homewyse is averaging across both standard and custom sizes. Use the $900 to $2,500 range as your baseline for the pan itself, and expect the full shower project to land in that $12,000 to $17,000 zone if you’re starting from a bathtub or standard shower.
How We Calculated These Shower Pan Costs
These ranges come from comparing multiple 2026 cost guides, including This Old House, Angi, Homewyse, and pricing on prefabricated curbless products sold through Home Depot. We also factored in trade labor rates for tile setters, which typically run $34 to $80 per hour depending on region and experience.
This is editorial judgment based on published averages, not a quote for your specific bathroom. Your actual price depends on your zip code, the contractor you hire, and site conditions like existing plumbing location. Treat these figures as a planning tool, then get two or three local bids before you commit to a budget.
Foam Tray Pans vs Mortar Bed Pans: Which Costs Less
A foam tray system, like the Schluter Kerdi Shower LT or LTS line, comes pre-sloped and ready to tile straight out of the box. The tray already has a waterproof membrane built in, so you skip the step of hand troweling a mortar bed and coating it separately. Schluter sells these trays in sizes up to 55 by 55 inches, with reduced perimeter heights specifically made for curbless entries.
A traditional mortar bed pan gives you more flexibility for odd shapes and unusual drain placement, but it takes longer to build. A tile contractor has to pack and slope the mortar by hand, let it cure, then apply a separate waterproofing membrane over the top before any tile goes down. That extra labor is usually why mortar bed custom pans land at the higher end of the cost range.
Foam tray systems tend to save money on labor but cost more upfront in materials. Mortar bed pans cost less in materials but take more skilled labor hours. For a straightforward rectangular shower, the foam tray usually wins on total price. For a genuinely unusual layout, a mortar bed still might be your only real option.
Center Drains vs Linear Drains in a Curbless Shower
A center drain requires the floor to slope from all four sides toward one point in the middle of the shower. That works fine, but it also means every wall creates its own slight incline, which can look uneven with large format tile.
A linear drain, like the Schluter Kerdi Line, only needs the floor to slope in one direction. That single plane slope is a big reason linear drains have become the standard choice for curbless showers. It lets you run 24 by 24 inch or larger tile across the entire shower floor without visible warping at the seams.
Linear drains typically add $150 to $400 more than a standard center drain once you account for the channel body and matching foam tray. Most tile pros consider that extra cost worth it for a curbless shower, since the flatter look reads as more finished.
Building a Curbless Shower Pan Step by Step
A typical custom curbless pan installation follows the same basic sequence, whether your contractor uses foam or mortar. Framing and subfloor prep come first. The crew has to lower the subfloor slightly in the shower area, since a curbless pan needs somewhere to slope down into without raising the surrounding bathroom floor.
Next comes the drain and rough plumbing, followed by the pan itself. If it’s a foam tray, the installer bonds it directly to the subfloor with thinset mortar. If it’s a mortar bed, the crew packs, screeds, and slopes it by hand, typically to a 1/4 inch per foot pitch toward the drain.
Waterproofing goes over the pan next, whether that’s a built-in membrane on a foam tray or a separate sheet membrane over mortar. Tile installation follows once the waterproofing cures and passes a flood test, where the drain gets plugged and the pan holds water for 24 hours to check for leaks.
Common Mistakes That Cause Curbless Shower Leaks
Skipping the flood test is the single biggest mistake homeowners make when a DIY curbless shower ends up leaking. A pan can look perfectly sloped and still have a low spot that traps water against the subfloor for years before anyone notices.
Undersized slope is another common issue. Some installers slope the floor too gently to save on floor height, which sounds reasonable but leaves standing water near the drain. Codes and manufacturer instructions generally call for a minimum 1/4 inch per foot slope, and cutting that shorter defeats the whole point of the drain.
Cutting corners on the transition zone between the shower and the rest of the bathroom floor causes problems too. If that zone lacks proper waterproofing continuity, water can wick sideways under the tile and into the surrounding room, even though the shower itself never overflows.
When to Hire a Licensed Plumber or Tile Pro
Call a licensed plumber any time the drain needs to move, since relocating a drain usually means cutting into the subfloor and possibly the joists below it. That’s not a job to guess your way through, especially in a second story bathroom where a leak can damage the ceiling below.
Hire a tile contractor with documented curbless shower experience for the pan itself. Ask to see photos of a completed flood test on a past job, not just finished tile photos. A shower that looks great in pictures can still have a slope problem hiding underneath.
Always check local codes before finalizing your design, since some jurisdictions have specific requirements for slope, drain sizing, and accessible clearances. This is the one place in your project where a permit inspector actually protects you from a costly mistake down the road.
Is a Custom Curbless Shower Pan Worth the Cost
A custom curbless shower pan makes sense if you want a specific size, better accessibility, or a seamless look between your shower and bathroom floor. Expect to pay $900 to $2,500 for the pan and drain on their own, or $12,000 to $17,000 if you’re rebuilding the whole shower around it.
Foam tray systems with a linear drain generally offer the best mix of price and long term reliability for most rectangular showers. A mortar bed still makes sense for unusual shapes where a prefabricated tray simply won’t fit. Either way, the flood test before tiling is the one step that separates a shower that lasts decades from one that causes a slow leak nobody notices until the ceiling below starts to stain.
Curbless Shower Pan Questions
How much does a curbless shower pan cost to install?
A custom curbless shower pan typically costs $900 to $2,500 for the pan, drain, and labor combined. Larger showers or premium tile can push that above $4,000. A full curbless shower renovation, including demolition and glass, usually runs $12,000 to $17,000.
Can you use a regular shower pan for a curbless shower?
No, a standard shower pan has a built-in curb that blocks water from spreading onto the bathroom floor. Curbless showers need a pan specifically designed with reduced perimeter heights, like the Schluter Kerdi Shower LT line, or a custom mortar bed built to slope without a raised edge.
What is the best drain for a curbless shower?
A linear drain works best for most curbless showers because it only needs the floor to slope in one direction. That single plane slope lets you use large format tile without visible unevenness, which is harder to achieve with a traditional center drain.
Do curbless showers leak more than traditional showers?
A properly built curbless shower doesn’t leak more than a traditional one, as long as the pan gets a flood test before tile goes down. Most leak problems trace back to skipped waterproofing steps or an incorrect slope, not the curbless design itself.
How much slope does a curbless shower floor need?
Most manufacturers and trade standards call for a minimum 1/4 inch per foot slope toward the drain. Anything less risks standing water near the drain, while a steeper slope can make the floor feel uneven underfoot.
