

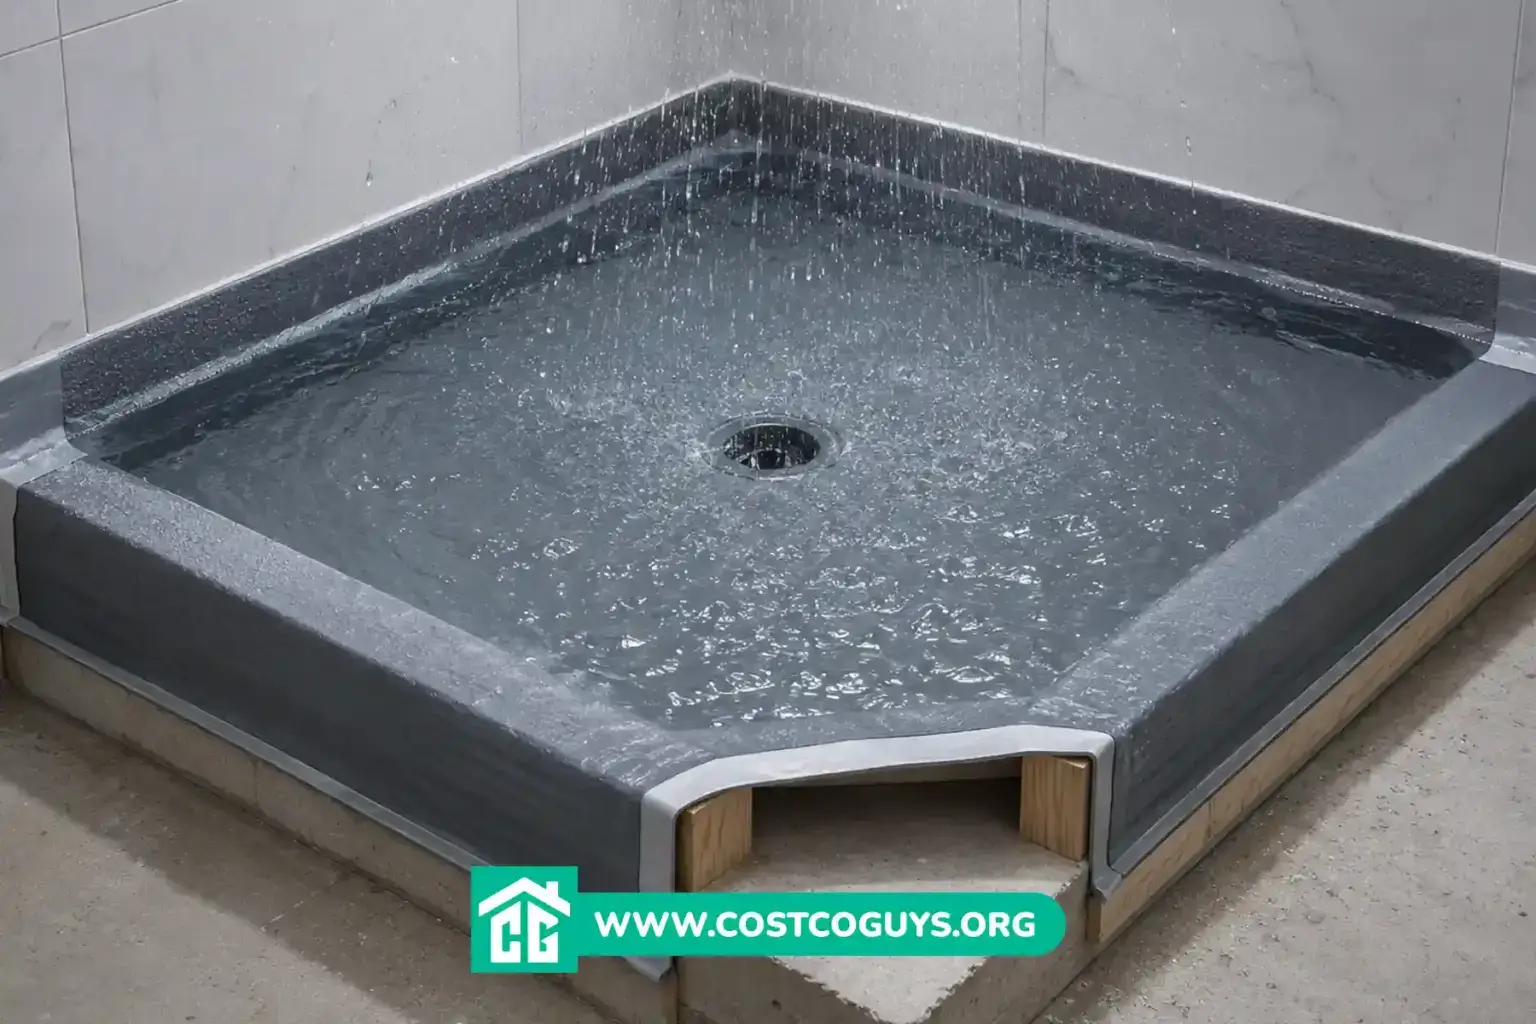

A shower pan waterproofing membrane is the barrier that keeps water inside your shower instead of soaking into the subfloor, and most homeowners spend $700 to $2,000 total on materials and labor for this step in 2026. The exact cost depends on which membrane type you choose and whether you hire a tile setter or do it yourself.
- What This Membrane Actually Protects You From
- Liquid Membrane vs Sheet Membrane vs PVC Liner
- Step-by-Step: Waterproofing a Shower Pan With a Liquid Membrane
- Shower Pan Waterproofing Membrane Cost Breakdown for 2026
- How This Cost Estimate Was Reached
- Common Mistakes That Cause Membrane Failures
- When to Call a Tile Pro Instead of Doing It Yourself
- Choosing the Right Shower Pan Waterproofing Membrane
- Frequently Asked Questions
- Do I need a shower pan liner if I already use a liquid waterproofing membrane?
- How long does a shower pan waterproofing membrane last?
- Can I tile directly over a shower pan liner without a mortar bed?
- What’s the difference between a waterproof membrane and a crack isolation membrane?
- Is RedGard as good as Schluter Kerdi for a shower floor?
What This Membrane Actually Protects You From
Grout and tile aren’t waterproof on their own. Water passes through grout lines every time you shower, and without a membrane underneath, that moisture soaks straight into the mortar, the backer board, and eventually the wood framing behind your walls and floor.
A shower pan liner or membrane creates a continuous waterproof layer between your tile and the structure of your bathroom. It sits under the floor tile, climbs up the walls a few inches above the shower head, and wraps the drain so water has nowhere to go but down the drain.
Public plumbing code guidance and manufacturer installation manuals agree on one detail worth remembering: a single pinhole in a poorly applied membrane can let through close to a gallon of water a day. Trapped behind tile, that’s enough to rot a floor joist within six months.
Liquid Membrane vs Sheet Membrane vs PVC Liner
Three systems dominate residential shower waterproofing, and each one fits a different type of project. None of them is universally “better.” They trade off differently on cost, skill level, and how forgiving they are of an imperfect substrate.
Liquid waterproofing membranes, like RedGard from Custom Building Products or HydroDefense from Laticrete, go on with a paint roller in two coats. You let each coat cure for roughly 12 to 24 hours before applying the next one, and the surface dries into a rubberized, seamless skin. This is the system most DIYers pick because it doesn’t require cutting or seaming.


Sheet membranes, like the Schluter Kerdi system, bond to cement backer board with unmodified thinset mortar (a cement-based adhesive with no added polymers). They create a vapor-tight envelope and give you a consistent thickness across the whole shower, which is why professional tile setters tend to prefer them for larger or more complex showers.
PVC and CPE shower pan liners work differently. Instead of bonding to the surface, these flexible sheets get folded and draped under a mortar bed, creating a catch pan that channels water to the drain through small weep holes. This method has been the standard for traditional mud-set shower pans for decades, and it’s still required in many jurisdictions for that specific construction method.
Which System Fits Your Project
If you’re tiling over cement backer board in a standard alcove shower, a liquid membrane or Kerdi sheet system both work well. If you’re building a traditional sloped mortar bed shower pan from scratch, a PVC liner is usually the expected approach, and some local codes still specify it by name.
Curbless showers and custom layouts with a bench or angled wall lean toward sheet membranes or a liquid system, since both handle odd geometry better than a folded PVC liner. A skilled installer can shape either one around a linear drain or an off-center layout without much trouble.
Step-by-Step: Waterproofing a Shower Pan With a Liquid Membrane
This sequence covers the most common DIY-friendly method. It assumes your drain, backer board, and slope are already in place and ready for waterproofing.
- Confirm the substrate is dry, clean, and free of dust or grease. Any contamination stops the membrane from bonding properly.
- Apply waterproofing tape or a fabric strip over every seam in the backer board and at the wall-to-floor corners.
- Install a bonding flange or drain collar per the drain manufacturer’s instructions, since this is where most leaks start.
- Roll on the first coat of liquid membrane across the entire floor and up the walls at least 6 inches above the shower head.
- Let the first coat cure for 12 to 24 hours, checking the manufacturer’s label for exact timing in your climate.
- Apply a second coat in a different direction (if coat one went vertical, roll coat two horizontal) to catch any missed spots.
- Let the membrane cure fully, typically 24 to 72 hours depending on humidity, before setting tile.
- Do a flood test on the shower floor for 24 hours before tiling, plugging the drain and filling the pan to check for leaks.
Skipping the flood test is the single most common shortcut that leads to a callback. It costs you a day, but it’s the only real way to catch a membrane failure before it’s buried under tile.
Shower Pan Waterproofing Membrane Cost Breakdown for 2026
Material prices vary by brand and region, and different pricing sources report slightly different ranges for sheet membrane, likely because some figures reflect big-box retail pricing and others reflect contractor wholesale accounts. The ranges below reflect the middle ground across current sources.
| Membrane Type | Material Cost (per sq ft) | What Affects the Price |
|---|---|---|
| Liquid membrane (RedGard, HydroDefense) | $0.75 – $1.50 | Brand, coverage rate per gallon, number of coats needed |
| Sheet membrane (Kerdi and similar) | $1.20 – $2.50 | Roll width, fleece backing, retail vs. contractor pricing |
| PVC or CPE shower pan liner | $0.60 – $1.00 | Liner thickness, custom vs. standard roll sizes |
| Professional labor (all types) | $3.00 – $6.00 | Local labor rates, shower size, drain complexity |
For a typical 60 square foot shower, expect to spend $700 to $2,000 total on waterproofing when you hire a pro, materials and labor combined. Doing it yourself drops that to roughly $100 to $250 in materials, though you’re taking on the liability if the membrane fails.
How This Cost Estimate Was Reached
These ranges come from current contractor pricing guides, manufacturer coverage specs, and retail listings for RedGard, HydroDefense, and Kerdi products as of mid-2026. This is a typical-range estimate based on editorial research, not an audited or official pricing table, and actual bids will move with your zip code and shower size.
Labor rates carry the widest swing. A tile setter in a high cost-of-living metro area can charge double what a rural contractor charges for the same square footage. Shower complexity matters too. A linear drain, a bench, or a curbless entry adds cutting time and material waste that a simple rectangular pan doesn’t need.
Common Mistakes That Cause Membrane Failures
Rushing the cure time between coats is the mistake that shows up most often in failed showers. Liquid membranes need that full 12 to 24 hour window to actually cross-link into a solid rubber layer. Tiling over a wet or half-cured coat traps moisture underneath instead of blocking it.
Skipping the corner and seam reinforcement is another repeat offender. Flat walls and floors rarely fail. Corners, drain collars, and wall-to-floor transitions fail constantly, because that’s where the membrane has to stretch and bend the most.
Not accounting for standing water is a subtler mistake. A shower floor needs a slope of about a quarter inch per foot toward the drain. Without it, water pools on the membrane surface instead of draining, and pooled water finds every weak point over time.
When to Call a Tile Pro Instead of Doing It Yourself
Call a licensed tile contractor if your shower has a curbless entry, a linear drain, or any structural work tied to the drain location. Moving a drain on a concrete slab means cutting concrete, and that’s not a beginner DIY task.
You should also bring in a pro if you’re waterproofing a second-floor bathroom above living space. A failed membrane there doesn’t just ruin your shower floor, it can damage a ceiling below. Always check your local building codes before starting, since some jurisdictions require permits or specific membrane certifications like ANSI A118.10 for load-bearing waterproof membranes.
If you’re comfortable with tile work, have done backer board installation before, and your shower is a standard rectangular alcove, a liquid membrane system is realistic for a confident DIYer. The forgiveness of a roll-on system is exactly why it’s the most common homeowner choice.
Choosing the Right Shower Pan Waterproofing Membrane
The right shower pan waterproofing membrane depends more on your shower’s shape than your budget. Standard alcove showers do well with a liquid membrane for its low cost and simple application. Custom layouts with benches, curbless entries, or unusual drains generally get better results from a sheet membrane system, and traditional mud-set pans still call for a PVC liner in most cases.
Whichever system you pick, the cure time and the flood test matter more than the brand name on the bucket. Expect to spend $700 to $2,000 for a professionally installed 60 square foot shower, and budget on the higher end if your layout includes a linear drain, a bench, or floor-to-ceiling waterproofing for a wet room.
Frequently Asked Questions
Do I need a shower pan liner if I already use a liquid waterproofing membrane?
No, you typically choose one system, not both. A liquid membrane applied over backer board and a properly sloped mortar bed already creates a complete waterproof layer, so a separate PVC liner isn’t needed in that setup.
How long does a shower pan waterproofing membrane last?
A correctly installed membrane, whether liquid, sheet, or PVC, should last as long as the shower itself, often 20 years or more. Failures almost always trace back to installation errors like rushed cure times or unsealed corners, not the membrane material wearing out.
Can I tile directly over a shower pan liner without a mortar bed?
No, PVC and CPE liners are designed to sit under a poured mortar bed, not directly under tile. Tiling straight onto a PVC liner without the mortar bed on top leaves the tile without proper support and slope.
What’s the difference between a waterproof membrane and a crack isolation membrane?
A waterproof membrane blocks liquid water, tested under ANSI A118.10. A crack isolation membrane, tested under ANSI A118.12, keeps small substrate cracks from telegraphing up into your tile. Some products, like certain MAPEI membranes, are rated for both functions in one layer.
Is RedGard as good as Schluter Kerdi for a shower floor?
Both meet ANSI A118.10 waterproofing standards, so both work when installed correctly. RedGard costs less and suits DIY projects, while Kerdi’s consistent sheet thickness is why many professional tile setters prefer it for larger or more complex showers.
