

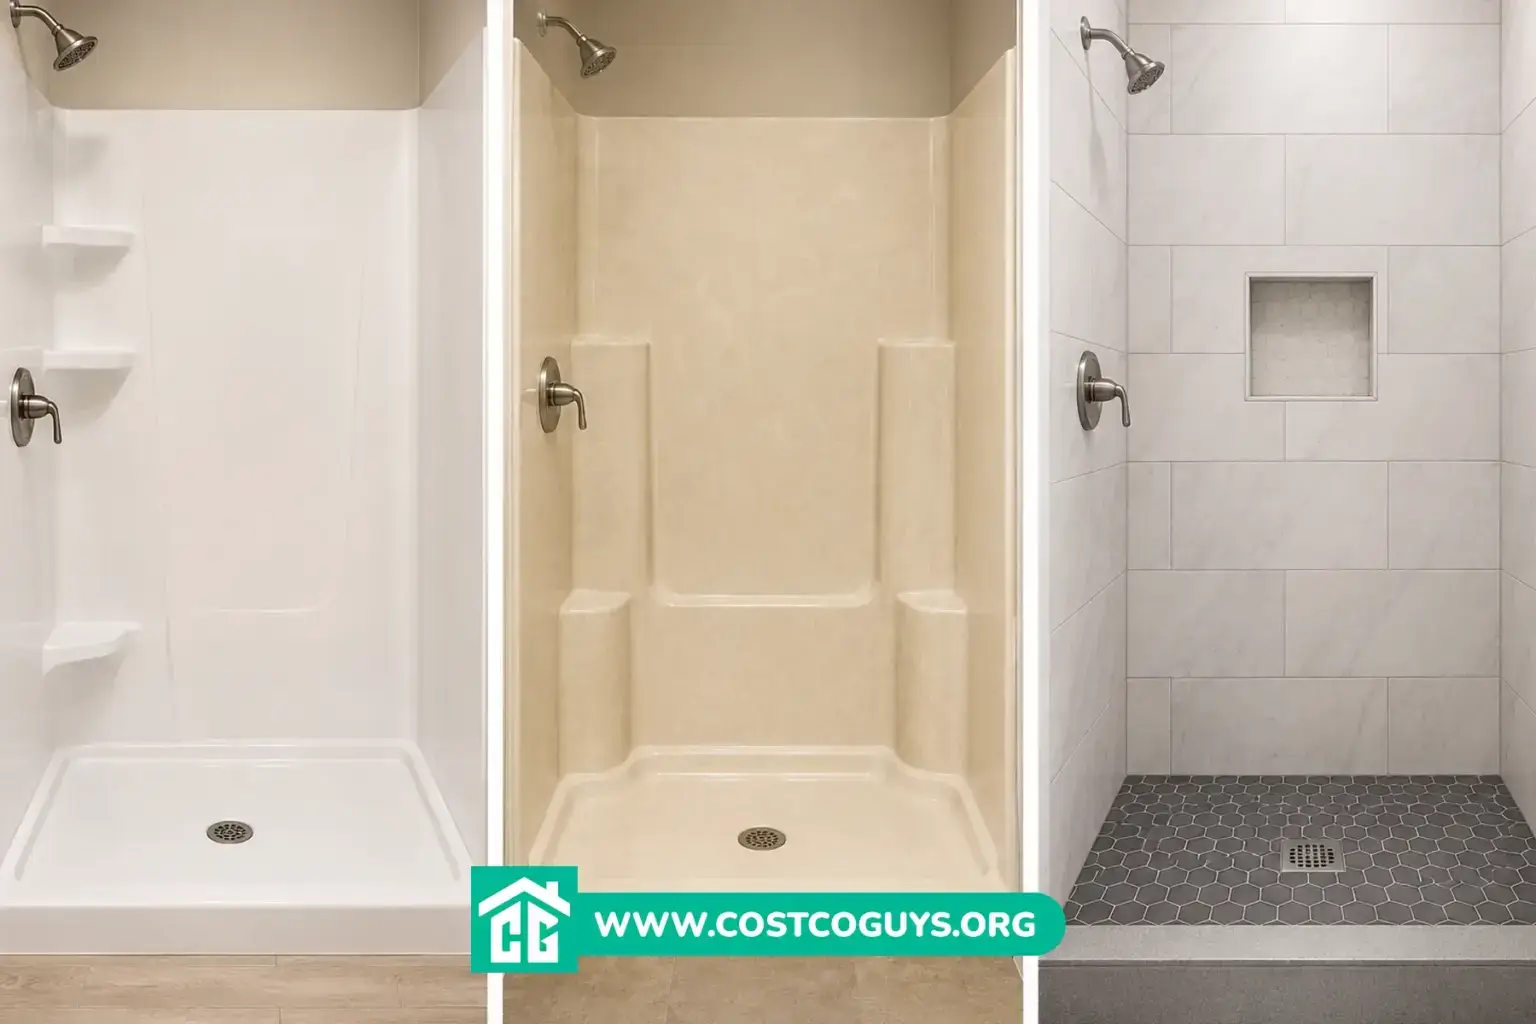

A 36 x 48 shower pan gives you a rectangular shower floor with 36 inches of depth and 48 inches of width, and it typically runs $150 to $950 for the pan alone, depending on material and brand. Add installation and the total climbs to $900 to $2,300 for most homes.
- What a 36 x 48 Shower Pan Fits
- Shower Pan Materials Compared
- Center Drain vs Off-Center Drain Placement
- Shower Curb and Threshold Options
- Installing a 36 x 48 Shower Pan
- Cost to Buy and Install a 36 x 48 Shower Pan
- DIY vs Hiring a Pro for This Install
- When to Call a Licensed Plumber
- Choosing the Right 36 x 48 Shower Pan
- 36 x 48 Shower Pan FAQs
Last Updated: August 13, 2026
That price gap comes down to one thing: what the pan is made of and whether you’re installing it yourself or hiring a plumber and tile setter. This guide walks through the options for this exact size, so you can figure out what fits your bathroom and your budget.
What a 36 x 48 Shower Pan Fits
A 36 x 48 shower pan works well for a walk-in shower or an alcove shower where you’re replacing a tub. The extra 12 inches of width compared to a 36 x 36 square pan gives you more room to add a bench, a niche, or a second showerhead without feeling cramped.
Before you buy, measure your rough opening at the framing, not the finished wall. Most manufacturers list the pan’s exact footprint plus a tolerance of about 1/4 inch, and a pan that’s even slightly too big won’t sit flush against the studs.
Shower Pan Materials Compared
You’ve got three real choices for a 36 x 48 shower pan: acrylic, fiberglass, or a tileable base with an integrated drain and slope built in. Each one changes your budget, your install time, and how the finished shower looks.


| Material | Typical pan cost | Best for |
|---|---|---|
| Fiberglass | $150-$400 | Tight budgets, rental units, quick swaps |
| Acrylic | $250-$550 | Better durability and shine than fiberglass, still budget-friendly |
| Tileable (ready-to-tile) base | $300-$950 | Custom tile look with a factory-sloped, waterproof pan underneath |
Acrylic and fiberglass pans arrive as one finished piece, so you install them and you’re done. Tileable pans, like the ones sold under the Tile Redi name, come with the slope and curb already built in, so you skip the traditional mud bed and tile straight on top.
Tile Redi builds each pan with a 1/4 inch per foot slope to meet plumbing code, which channels water to the drain and helps prevent standing water on the shower floor. :antCitation[]{citations=”7c40617e-3fa4-4098-a689-fe68ff11f7c7″ injected=”space”} That built-in pitch is the main reason tileable pans have gotten popular with remodelers who want a custom tile shower without pouring a traditional mortar bed.
Center Drain vs Off-Center Drain Placement
Most 36 x 48 shower pans ship with a center drain, which lines up with standard rough-in plumbing in a lot of older homes. If your existing drain stub-out sits somewhere other than dead center, you’ll need a pan with an offset drain, or you’ll need to move the drain line before you set the pan.
Moving a drain line means cutting into the subfloor and possibly the joists below it. That’s a job for a licensed plumber, not a weekend DIY project, because it touches your home’s waste line and can affect the slope needed for proper drainage.
Shower Curb and Threshold Options
A single curb shower pan has one raised edge at the entry point. A double threshold pan has a slightly raised lip on two sides, which some homeowners prefer for a walk-in feel with less of a step-over. Curb height on most pans runs a few inches, though a handful of low-profile and curbless designs exist for accessibility.
If accessibility matters for your household, look specifically for a curbless or low-threshold 36 x 48 pan rather than assuming a standard model will work. Curbless pans need a different subfloor setup to keep water from escaping the shower area, so plan that detail before you buy.
Installing a 36 x 48 Shower Pan
Here’s what you’ll typically need on hand for a straightforward pan swap:
- The shower pan and matching drain kit (PVC or brass, depending on your existing drain)
- Mortar mix or the manufacturer’s recommended setting bed
- Plumber’s putty or silicone sealant
- A level and a tape measure
- Basic hand tools: a drill, a wrench, a utility knife
The general process runs like this: remove the old pan, check the subfloor for rot or soft spots, dry-fit the new pan against the drain, set it in a mortar bed for a solid, level base, connect the drain, and let everything cure before you test it with water. Skipping the mortar bed is one of the most common mistakes homeowners make, since an unsupported pan can flex, crack, and eventually leak.
Watertight seals at the drain connection matter more than almost any other step. A loose or poorly sealed drain fitting is the single most common cause of a shower pan failing within the first year.
Cost to Buy and Install a 36 x 48 Shower Pan
:antCitation[]{citations=”379a84f5-9c5d-4a99-9e50-1a718f209ea2″ injected=”space”}
| Scope of work | Typical cost range | What affects the price |
|---|---|---|
| Pan only, DIY install | $220-$520 | Includes the pan, drain assembly, plumber’s putty, and mortar |
| Professional pan replacement | $900-$2,300, averaging around $1,620 | Labor :antCitation[]{citations=”13110f53-4493-4c69-a6b3-651e06dc94ad” injected=”space”} rates, demolition, and whether the drain moves |
| Custom tile shower floor | $900-$3,500 | Tile choice, size, and mud bed vs tileable pan |
Labor is the biggest swing factor. Plumbing and tile professionals generally charge $50 to $150 an hour just to remove an old pan and the material underneath it, :antCitation[]{citations=”2ffdcf97-a730-486a-83ec-774a2713a80e” injected=”space”} and that number climbs fast if they find water damage in the subfloor or wall framing once the old pan comes out.
How We Estimated These Costs
These ranges come from a mix of manufacturer pricing for 36 x 48 shower pans, retailer listings, and published 2026 contractor cost data from home improvement pricing guides. Your actual price depends on your local labor market, the condition of your existing plumbing and subfloor, and which material you choose. Treat every figure here as a planning range, not a guaranteed local quote.
DIY vs Hiring a Pro for This Install
Swapping a prefab acrylic or fiberglass pan into an existing shower footprint, with the drain staying in the same spot, is realistic for an experienced DIYer. You’re mostly dealing with a mortar bed, a drain connection, and basic leveling.
Hiring a pro makes more sense once the project involves moving the drain, repairing a rotted subfloor, or setting a tileable pan with a full custom tile surround. Those jobs require more precision with slope and waterproofing, and a mistake there often costs more to fix than the labor would have cost upfront.
When to Call a Licensed Plumber
Call a plumber if your project involves moving the drain location, if you find signs of an existing leak in the subfloor or wall cavity, or if your home’s drain line needs any modification to accept the new pan. Local plumbing codes and permit requirements can differ by city and county, so check with your local building department, sometimes called the AHJ, before you cut into any drain line.
Choosing the Right 36 x 48 Shower Pan
A 36 x 48 shower pan gives you a solid middle ground between a compact stall and a full custom shower, and the right choice usually comes down to three things: your budget, whether you want a tileable finish, and where your existing drain sits. Fiberglass and acrylic pans keep costs and install time down. A tileable pan costs more upfront but gives you a custom look with a built-in waterproof slope.
Measure your rough opening, confirm your drain location, and decide early whether you’re comfortable handling the mortar bed and drain connection yourself. That one decision will shape both your budget and your timeline more than anything else on this list.
Related: Costco Guys guide on shower pan sizes and how to measure a shower stall.
Related: Costco Guys guide on waterproofing a tile shower floor.
36 x 48 Shower Pan FAQs
Can I install a 36 x 48 shower pan myself?
Yes, if you’re replacing an existing pan in the same footprint and the drain stays in the same spot. If the drain needs to move or you find subfloor damage, call a licensed plumber before you go further.
What’s the difference between a tileable shower pan and a regular acrylic pan?
A tileable pan comes with the slope, curb, and drain already built in, and you tile directly on top of it. An acrylic or fiberglass pan is a finished, one-piece unit that doesn’t get tiled at all.
Does a 36 x 48 shower pan always have a center drain?
Most models ship with a center drain since it matches standard rough-in plumbing, but left-drain and right-drain versions exist for homes with an offset drain stub-out.
How long does it take to install a 36 x 48 shower pan?
A straightforward pan swap with an experienced DIYer typically takes a full day, including mortar curing time. A tileable pan with a full custom tile surround can take several days once you factor in tile setting and grout curing.
What causes a shower pan to leak after installation?
A poorly sealed drain connection is the most common cause, followed by skipping the mortar bed underneath the pan. Both leave the pan unsupported or unsealed, which shows up as leaks within the first year of use.
