

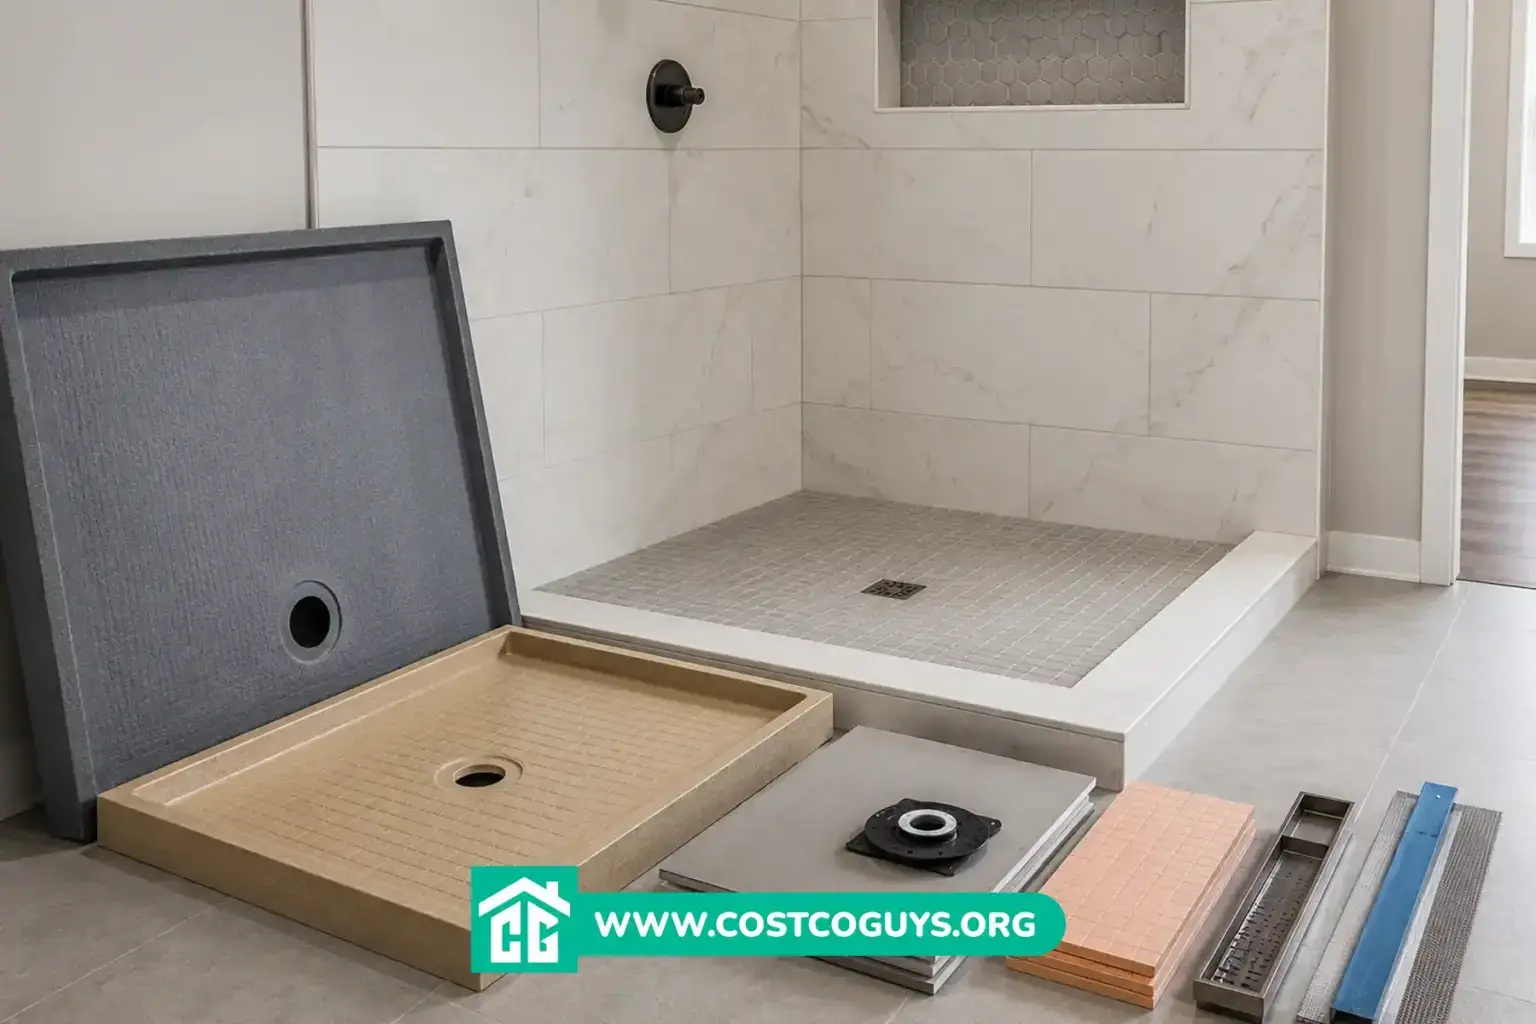

A tile shower pan kit typically costs between $700 and $1,900, depending on size, drain style, and whether you choose a foam base like Wedi, a polyurethane base like Tile Redi, or a Schluter Kerdi system. The price covers the pre-sloped base, curb, and waterproofing components, but not tile, thin-set, or labor.
- What a Tile Shower Pan Kit Actually Includes
- Tile Shower Pan Kit Cost by Brand and Size
- Foam Versus Polyurethane Shower Base Materials
- Curbless and Linear Drain Shower Pan Options
- Tile Redi vs Wedi vs Schluter Kerdi Systems
- How to Install a Tile Shower Pan Kit
- Common Mistakes That Cause Leaks Later
- DIY Installation Versus Hiring a Pro
- Choosing the Right Tile Shower Pan Kit
What a Tile Shower Pan Kit Actually Includes
A tile shower pan kit is a pre-sloped, ready-to-tile shower base that replaces a traditional mortar bed. Most kits include the base itself, a curb piece if you want a step-over threshold, and a waterproofing membrane or coating built into the foam or polyurethane structure.
The core idea is simple. You set the pan on the subfloor, seal the seams, and tile straight over it. There is no need to build a mortar bed and hope the slope toward the drain works out.
Some kits, like the Schluter Kerdi-Shower-Kit, ship the tray separately from the Kerdi membrane and strips, so you assemble the waterproofing system as you install. Others, like Tile Redi’s Redi Base line, arrive with the waterproofing built into the polyurethane shell.
Tile Shower Pan Kit Cost by Brand and Size
Prices vary a lot by brand, tray size, and drain configuration. Larger trays, linear drains, and bench combinations all push the price up. Here is what current retail listings show for common sizes.
| Kit Type | Typical Cost Range | What Affects the Price |
|---|---|---|
| Tile Redi Base 36×36 single curb | $700 to $800 | Drain finish, curb count |
| Tile Redi Base’N Bench (with built-in bench) | $1,000 to $1,150 | Bench size, drain side |
| Tile Redi Redi Trench (linear drain) | $850 to $950 | Trench length, grate style |
| Wedi Fundo shower pan (foam, pan only) | $700 to $1,830 | Pan footprint, whether wall boards are bundled |
| Schluter Kerdi-Shower-Kit (tray, curb, membrane) | $800 to $1,900 (estimated) | Tray size, ABS versus PVC drain body |
These figures come from current retailer and manufacturer listings, not a national average. Local pricing can shift based on your supplier, shipping costs, and whether you buy a full kit or piece it together.


Foam Versus Polyurethane Shower Base Materials
Wedi and Schluter both use expanded polystyrene, known as EPS foam, for their pre-sloped bases. EPS is lightweight, holds up under compression once tiled, and cuts easily with a standard utility knife if you need to notch it around plumbing.
Tile Redi uses solid polyurethane instead. It is heavier than foam but comes pre-pitched at the factory with the slope already correct, so there is less on-site cutting or shaping involved.
Neither material is clearly better across the board. Foam systems give you more flexibility to customize size and drain placement on site. Polyurethane systems arrive closer to finished and need less fitting.
Curbless and Linear Drain Shower Pan Options
If you want a curbless or barrier-free shower, look for a pan built specifically for zero-entry use. These pans slope from all sides toward a linear drain along one wall, which lets the floor stay flush with the rest of the bathroom.
Tile Redi’s Redi Trench and WonderFall Trench lines are built around this layout. Wedi also offers a linear drain version of its Fundo system for the same purpose.
Curbless designs work best when the subfloor allows for a slight recess, since the pan needs room to slope without raising the shower floor above the rest of the room. This matters more in slab-on-grade homes than in homes with a wood-framed subfloor.
Tile Redi vs Wedi vs Schluter Kerdi Systems
All three brands solve the same problem: skip the mud bed, keep water out, get to tile faster. They differ in how they get there.
| Feature | Tile Redi | Wedi | Schluter Kerdi |
|---|---|---|---|
| Base material | Solid polyurethane | EPS foam | EPS foam |
| Waterproofing | Built into pan | Foam plus liquid or sheet coating | Separate Kerdi membrane |
| Bench option | Yes, Base’N Bench line | Yes, separate bench pieces | Limited, mostly custom-built |
| Best for | Fast installs, standard layouts | Custom sizing, curbless builds | Homeowners already using Kerdi wall board |
If your bathroom has a standard footprint and you want the fastest path to tile, Tile Redi’s pre-pitched pans usually get you there quickest. If you are cutting a custom size for an oddly shaped bathroom, foam systems from Wedi or Schluter give you more room to adjust.
Internal link opportunity: link to a Costco Guys guide on curbless shower conversion costs.
How to Install a Tile Shower Pan Kit
Start with a clean, flat, structurally sound subfloor. Plywood or cement backer board both work as a base layer under the pan.
Dry-fit the pan first. Check that the drain lines up with your existing plumbing before you commit any adhesive or thin-set.
Set the pan in thin-set mortar or the manufacturer’s recommended adhesive, then seal the seams and drain connection per the kit instructions. Foam kits usually need a liquid waterproofing coating or a membrane strip at the seams. Polyurethane kits like Tile Redi often skip this step since the pan itself is watertight.
Let everything cure fully before tiling. Rushing this step is one of the most common reasons a shower pan fails early. Give it the full cure time listed on the product, even if the surface looks dry sooner.
Common Mistakes That Cause Leaks Later
Skipping the dry-fit is a big one. Homeowners glue the pan down, then discover the drain does not line up cleanly with the trap below.
Undersizing the drain connection is another common issue. If the shower pan kit uses a different drain body than your existing plumbing expects, you may need an adapter, and guessing at compatibility instead of checking the spec sheet leads to leaks months later.
A third mistake is skipping seam sealant on foam-based kits. The pan itself will not leak, but an unsealed seam between the pan and the wall waterproofing will let moisture through over time.
DIY Installation Versus Hiring a Pro
Setting a pre-sloped shower pan kit is within reach for an intermediate DIY homeowner who has tiled before and is comfortable working with thin-set mortar. The pan does the hard part, the slope calculation, for you.
Hire a licensed plumber if the drain location needs to move, since that involves cutting into existing plumbing lines. If the subfloor shows soft spots, water staining, or signs of rot, bring in a contractor to assess the framing before you set any pan on top of it. A pan installed over a compromised subfloor will fail no matter how good the kit is.
Choosing the Right Tile Shower Pan Kit
For a standard rectangular shower with no bench, Tile Redi’s pre-pitched pans get you to tile the fastest. For a curbless build or an unusual footprint, a foam system from Wedi or Schluter gives you more room to adjust the size on site.
Whichever brand you pick, match the drain body to your existing plumbing before you order, and budget for the membrane or sealant accessories that some kits sell separately from the base tray. A tile shower pan kit saves real time over a mortar bed, but only if the drain lines up and the seams get sealed correctly the first time.
Is a tile shower pan kit waterproof on its own?
The pan itself is waterproof, but the full shower assembly is not watertight until the seams, curb, and wall transitions are sealed with the membrane or coating the manufacturer specifies. Skipping that step is the most common cause of early leaks.
Can I install a tile shower pan kit over a wood subfloor?
Yes, as long as the subfloor is flat, structurally sound, and free of soft spots or water damage. Plywood or cement backer board both work as the base layer under most kits.
Do I need a plumber to install a shower pan kit?
Not if the drain stays in its current location and you are comfortable with basic tile work. You will need a licensed plumber if the drain needs to move or if you are replacing old cast iron or lead drain fittings.
What size shower pan kit do I need?
Measure your existing shower footprint or the space you plan to frame out, then choose the closest standard size. Most brands offer 32×32 up to 48×72 trays, plus custom sizing on foam systems like Wedi.
Are foam shower pans as durable as polyurethane pans?
Yes, once tiled. EPS foam has high compressive strength and supports the weight of tile and thin-set the same way polyurethane does. The difference is mainly in how each material is manufactured and shaped, not long-term durability.
