

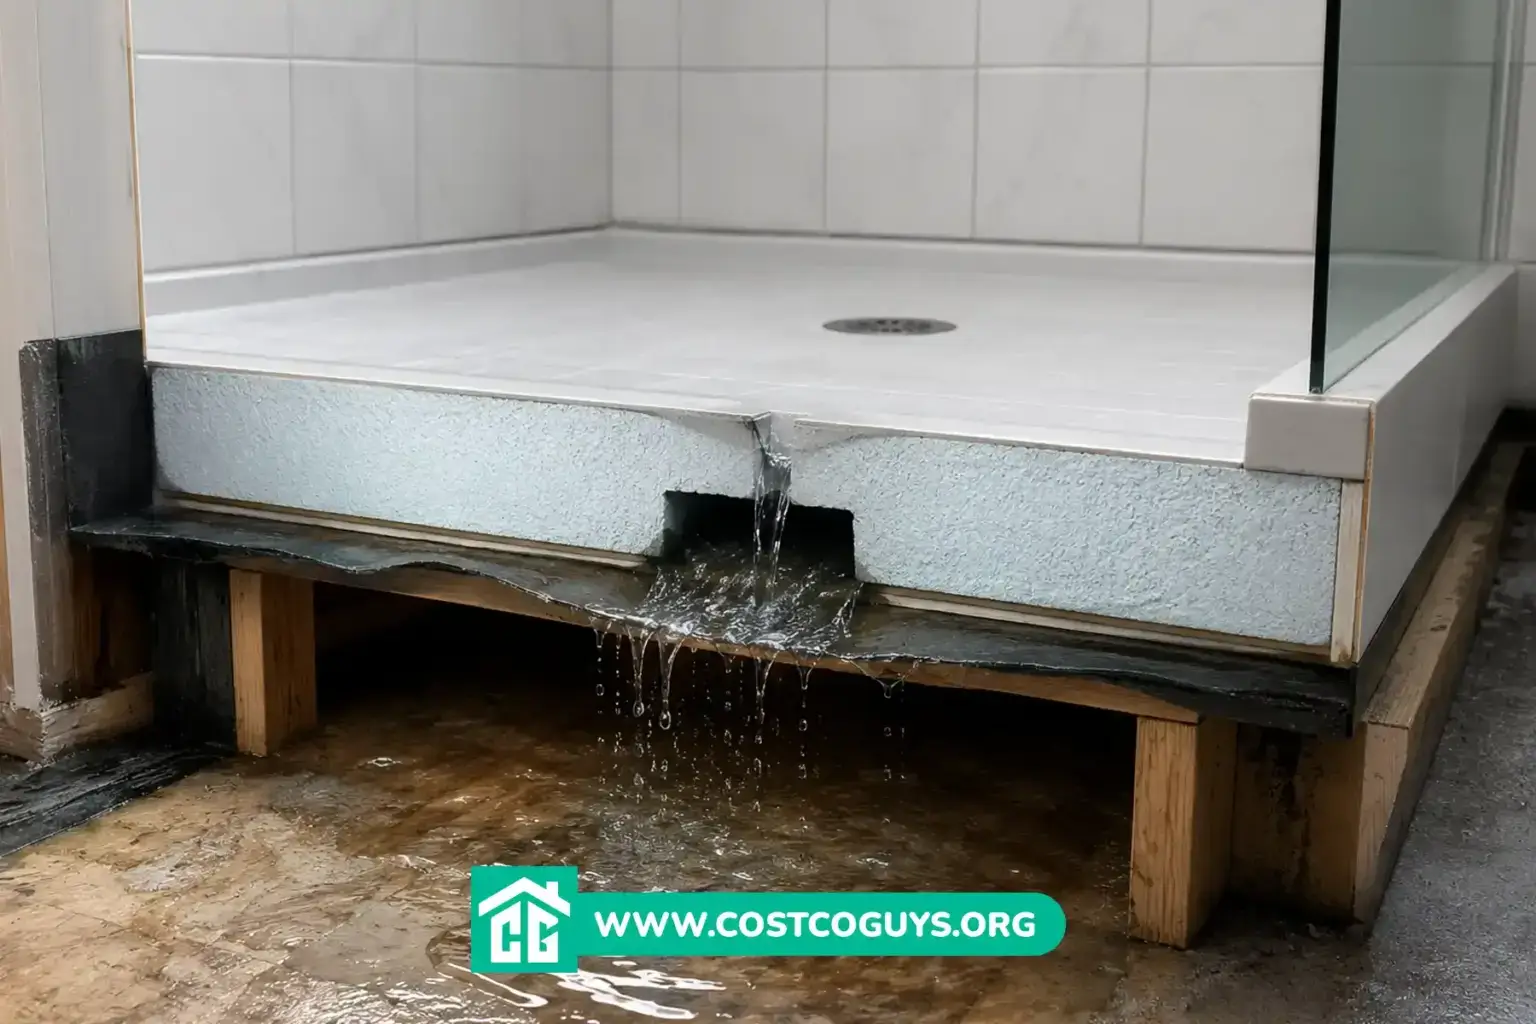

A foam shower pan is a pre-sloped base made from high-density expanded polystyrene, cut to your exact shower dimensions and ready for waterproofing and tile. Most homeowners pay $200 to $700 for the pan alone in 2026, and $900 to $3,500 once you add waterproofing, drain hardware, tile, and labor.
- What Is a Foam Shower Pan
- Foam Shower Pan Cost Guide 2026
- EPS vs XPS Foam Comparison
- How Custom Foam Shower Pans Ship
- Installing a Foam Shower Pan Step by Step
- Foam Pan vs Mud Bed vs Acrylic
- How We Calculated These Cost Estimates
- Common Foam Shower Pan Installation Mistakes
- When to Hire a Tile Contractor
- Foam Shower Pan Costs and Installation Facts
- Foam Shower Pan Frequently Asked Questions
What Is a Foam Shower Pan
A foam shower pan replaces the old method of hand-packing a mortar bed on the shower floor. Instead, a manufacturer builds the slope into a solid block of foam before it ever reaches your bathroom. You set the pan on the subfloor, connect the drain, add a waterproofing membrane, then tile straight over it.
Most pans use expanded polystyrene, known as EPS, or extruded polystyrene, known as XPS. Both are rigid foam products, not the loose-fill foam packaging material people picture when they hear “styrofoam.” EPS is made of small fused beads and costs less. XPS is a denser, extruded sheet foam with a tighter cell structure, and it costs more per square foot.
The pan arrives pre-sloped, usually at a quarter inch of drop per foot, which meets typical plumbing code drainage requirements for shower floors. That slope pushes water toward the drain without you having to trowel and screed a mud bed by hand.
Foam Shower Pan Cost Guide 2026
A stock foam shower pan kit for a standard 36 by 36 inch shower runs $60 to $250 for the base and drain kit alone, based on current retail listings from Home Depot and major online sellers. A fully custom foam pan, cut to your specific dimensions by a maker like STG Foam, Built With Foam, or Pacific Foam, typically costs $300 to $900 for the pan, curb, and any integrated bench.
Installed shower pan projects, including waterproofing, drain, tile, and labor, land between $900 and $3,500 according to cost data from Angi and HomeGuide. Tile labor alone runs $10 to $50 per square foot depending on your region and the tile pattern you choose.

| Item or Service | Typical Cost Range | What Affects the Price |
|---|---|---|
| Stock foam pan kit (36×36 to 48×48) | $60 – $250 | Size, included drain type, brand |
| Custom-cut foam pan (measured to your shower) | $300 – $900 | Dimensions, curb, integrated bench, drain offset |
| Waterproofing membrane and mortar | $100 – $400 | Sheet membrane vs liquid-applied, shower size |
| Tile labor for the shower floor and walls | $10 – $50 per sq ft | Tile size, pattern complexity, local labor rates |
| Full installed project (pan through finished tile) | $900 – $3,500 | Custom sizing, linear drain upgrade, curbless design |
A curbless or zero-threshold layout usually pushes cost toward the higher end of that range. It needs precise floor framing or a recessed subfloor to bring the pan flush with the bathroom floor, which adds carpentry time before the pan ever goes in.
EPS vs XPS Foam Comparison
EPS foam costs less and works fine for most residential showers, since the membrane and tile above it carry the real waterproofing and wear load. Manufacturers like STG Foam and Built With Foam use high-density EPS specifically because it holds tile mortar well and resists compression under foot traffic.
XPS foam costs more but has a tighter, closed-cell structure that absorbs slightly less moisture if the surface waterproofing ever gets compromised. For a standard residential shower with a proper membrane on top, the difference rarely matters in practice. XPS makes more sense for commercial showers or steam rooms with constant moisture exposure.
Neither foam type is watertight on its own. The waterproofing membrane, not the foam, is what actually keeps water out of your subfloor and the room below.
How Custom Foam Shower Pans Ship
Custom foam shower pan makers work from measurements you send them, usually your shower’s length, width, and drain location, trimmed about an eighth of an inch smaller than your actual framed opening. That small gap gives you room to fit the pan without forcing it against the studs.
Most custom orders ship within one to five business days, cut to order and boxed for freight or UPS ground delivery, based on published turnaround times from manufacturers like STG Foam in Utah and Built With Foam in Texas. You can typically add a matching foam curb, a shower bench, or a niche form to the same order, which keeps every surface in your shower built from one consistent material.
Linear drain pans, which slope to one edge instead of a center point, cost a bit more to manufacture but give you a cleaner sightline and let you set larger tile without a center drain interrupting the pattern.
Installing a Foam Shower Pan Step by Step
Set the pan on a clean, level subfloor and dry-fit it before you glue anything down. Check that the drain hole lines up with your rough plumbing and that the pan sits flush against all walls.
- Dry-fit the pan and trim any high spots on the subfloor so the pan sits flat.
- Bed the pan in thin-set mortar or a manufacturer-approved foam adhesive, then screw or bond it per the maker’s instructions.
- Install the drain body and connect it to your P-trap, which is the curved section of pipe under the drain that holds a small water seal to block sewer gas.
- Apply your waterproofing membrane over the entire pan, up the walls, and over the curb, following the specific system you chose.
- Run a flood test by plugging the drain and filling the pan with an inch of water for 24 hours to check for leaks before tiling.
- Tile the pan once the flood test passes and the waterproofing has fully cured.
Two waterproofing paths dominate the market. Sheet membrane systems like Schluter Kerdi bond a fabric membrane directly to the foam with thin-set mortar. Liquid-applied membranes, including several Oatey and RedGard-style products, roll on in coats and cure into a rubberized barrier. Both meet current shower waterproofing standards when installed to the manufacturer’s specifications.
Foam Pan vs Mud Bed vs Acrylic
A traditional mortar mud bed still gives you the most flexibility for odd shower shapes, since a tile setter builds the slope by hand on site. It costs $600 to $1,500 for a standard shower footprint including materials and labor, and it takes longer because the mortar needs time to cure before waterproofing goes on.
A prefab acrylic or fiberglass pan costs the least up front, often $100 to $400 for materials, but it locks you into the manufacturer’s fixed dimensions and limits your drain placement. You can’t easily reshape it for a curbless entry or an unusual footprint.
A foam pan sits in the middle. It costs more than a basic acrylic tray but less than a full mud bed once you factor in labor, and it gives you nearly the same custom sizing a mud bed offers, without the multi-day cure time.
How We Calculated These Cost Estimates
These ranges come from published 2026 pricing data at Angi, HomeGuide, and Homewyse, cross-checked against current retail and manufacturer pricing for stock and custom foam pans. We weighed material cost, typical tile labor rates, and the added carpentry time a curbless design requires.
Treat every figure here as a typical range, not a guaranteed local quote. Actual pricing depends on your region, your contractor’s rates, and how much custom shaping your shower layout needs. Get a written quote from a local installer before you budget a final number.
Common Foam Shower Pan Installation Mistakes
Skipping the flood test is the mistake that causes the most callbacks. Installers who tile straight over a fresh membrane without testing it often don’t find a pinhole leak until water damage shows up in the ceiling below months later.
Using the wrong adhesive is the second common error. Some installers try to set a foam pan with construction adhesive instead of the thin-set mortar or bonding agent the manufacturer specifies, which can leave gaps under the pan that flex over time and crack the tile above.
A poorly sealed drain connection ranks third. The drain body has to seat correctly against the pan and tie into the membrane with a bonding flange, not just a bead of caulk, or water will track down into the subfloor at that single point.
When to Hire a Tile Contractor
Call a licensed contractor if your project involves moving the drain location, since that touches your home’s rough plumbing and may need a permit depending on local building codes. Most jurisdictions require an inspection before you close up a relocated drain line.
A curbless or barrier-free shower also benefits from a contractor’s experience, because getting the subfloor recessed correctly for a flush entry takes framing knowledge most DIYers don’t have on hand. A pan that sits even a quarter inch too high or low at the threshold will show immediately once the floor tile goes down.
If your bathroom is on an upper floor, a leak has more places to travel before you notice it. That’s reason enough for many homeowners to have a professional handle the waterproofing and flood test, even if they plan to set the tile themselves.
Foam Shower Pan Costs and Installation Facts
A foam shower pan typically runs $200 to $900 for the pan itself and $900 to $3,500 once tile, waterproofing, and labor are part of the project. The biggest swing in that range comes from custom sizing, a curbless entry, and whether you hire out the tile work or do it yourself.
Get your measurements exact, choose a waterproofing system rated for the pan you buy, and run a flood test before a single tile goes down. That sequence, more than any single product choice, decides whether your shower floor holds up for the next twenty years.
Foam Shower Pan Frequently Asked Questions
How long does a foam shower pan last?
A properly waterproofed foam shower pan typically lasts as long as the tile and membrane above it, often 20 years or more. The foam itself doesn’t break down under normal use since it sits fully sealed beneath the waterproofing and tile.
Can you install a foam shower pan over a wood subfloor?
Yes, a wood subfloor works fine as long as it’s level, structurally sound, and free of squeaks or soft spots before you set the pan. Check the manufacturer’s bonding instructions, since some foam pans need a specific adhesive or mechanical fastening method on wood versus concrete.
Is a foam shower pan waterproof by itself?
No. The foam provides the slope and a stable substrate for tile, but the waterproofing membrane you apply on top is what actually blocks water from reaching the subfloor. Skipping or rushing that membrane step is the main cause of shower floor leaks.
How do you measure for a custom foam shower pan?
Measure the length and width of your framed shower opening, then subtract about an eighth of an inch from each dimension before you submit the order. Include your drain’s center point or offset location, since most manufacturers cut the drain hole to your exact plumbing layout.
Does a foam shower pan work for a curbless shower?
Yes, foam pans are a common choice for curbless and zero-threshold showers because manufacturers can taper the edge down to meet the bathroom floor level. Getting the subfloor recessed to the right depth beforehand is the part that usually needs a contractor’s help.
