

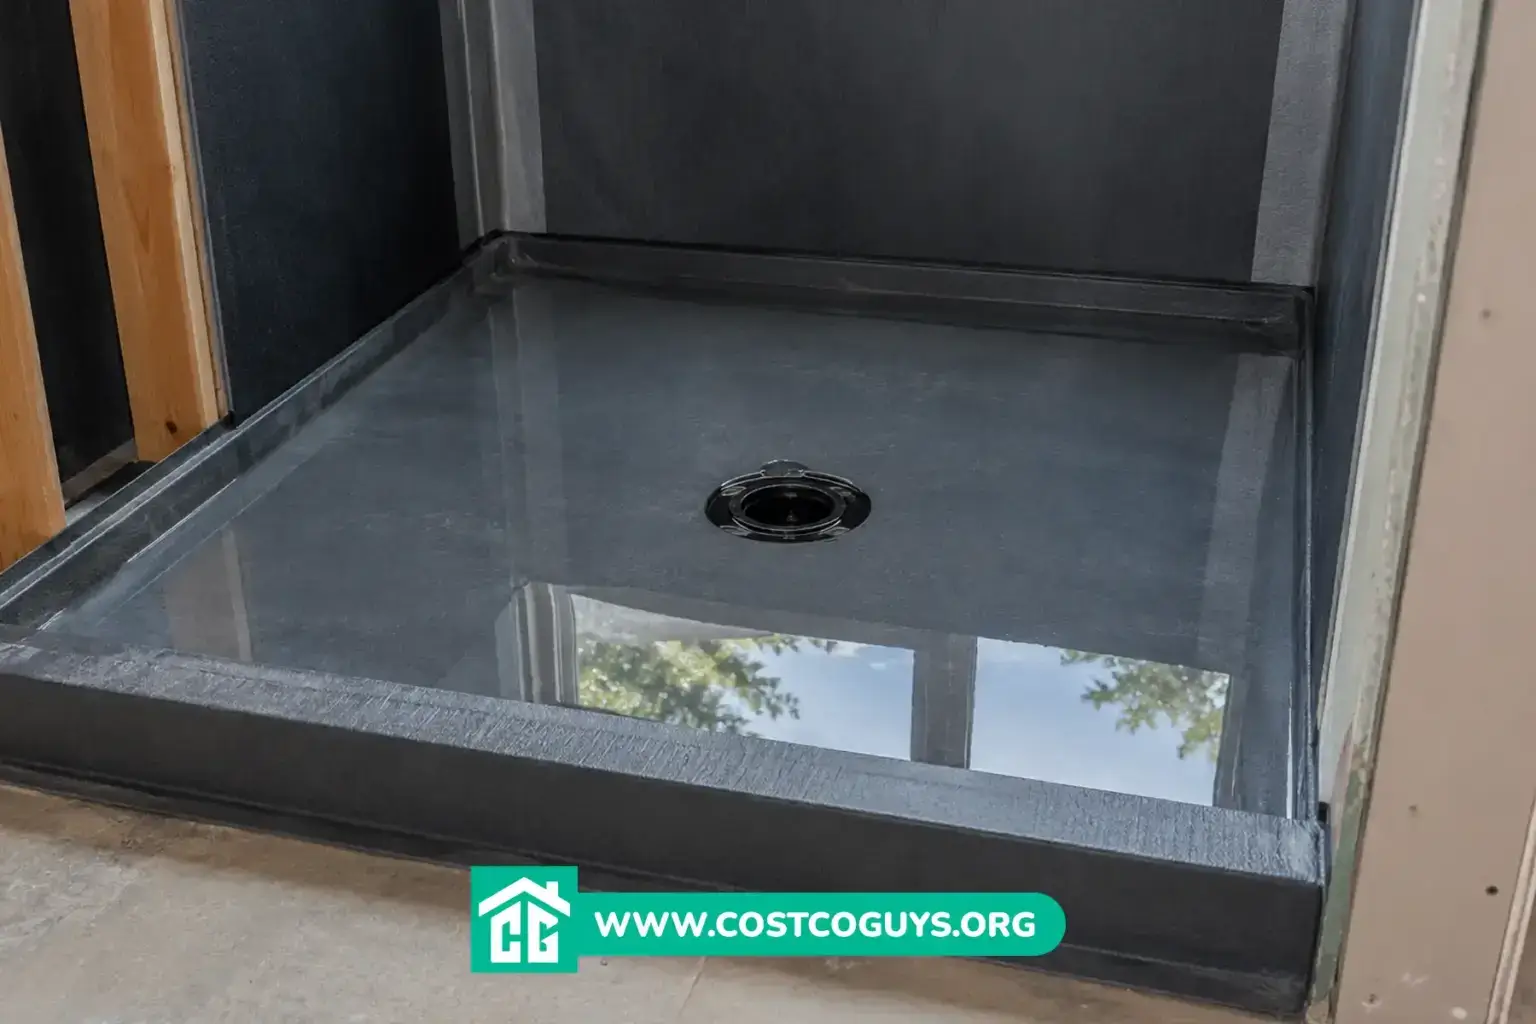

A shower pan underlayment is the waterproof membrane, usually a PVC or CPE sheet, installed between the subfloor and the mortar bed to stop water from reaching the framing below your tile shower. Most DIYers spend $150 to $400 on materials for a standard 4×5 foot shower, while hiring a pro for the full pan and liner installation typically runs $900 to $2,300 in 2026, depending on shower size and drain type.
- What a Shower Pan Underlayment Actually Does
- PVC Liner vs CPE Liner vs Preformed Pan
- Tools and Materials for a PVC Liner Installation
- Step-by-Step Shower Pan Liner Installation
- Build the Pre-Slope and Set the Drain Base
- Cut and Position the Liner
- Seal the Corners and Curb
- Connect the Drain and Cut the Weep Holes
- Run a Flood Test Before Tiling
- Pour the Top Mortar Bed
- How Much a Shower Pan Underlayment Costs in 2026
- How These Cost Ranges Were Determined
- Common Mistakes That Cause Liner Leaks
- When to Call a Plumber Instead of DIYing It
- Shower Pan Underlayment vs Ready-to-Tile Foam Pans
- Frequently Asked Questions
- How long does a PVC shower pan liner last?
- Can I install a shower pan liner over an old one?
- What size shower pan liner do I need?
- Do I need weep holes if I’m using a linear drain?
- Is a PVC liner or a foam shower pan better for a DIY project?
- Getting Your Shower Pan Underlayment Watertight
What a Shower Pan Underlayment Actually Does
Tile isn’t waterproof on its own. Grout lines let water through, and thinset (the cement-based adhesive that bonds tile to the base) doesn’t block moisture either. The underlayment is what actually keeps water out of your subfloor and wall framing.
In a traditional mortar bed shower, the liner sits between two layers. A pre-slope layer goes down first, sloped at roughly 1/4 inch per foot toward the drain. The liner drapes over that slope, then a second mortar bed goes on top to create the finished floor for your tile.
This two-layer setup matters because water that gets past your tile and grout doesn’t just disappear. It seeps down to the liner, runs along the pre-slope, and exits through weep holes in the drain body (small openings that let trapped water drain out instead of pooling on the subfloor). Skip this step or install it wrong, and you’re looking at rot, mold, or a soaked ceiling in the room below.
PVC Liner vs CPE Liner vs Preformed Pan
PVC sheet liner is the most common choice for DIY shower builds. Oatey’s PVC liner comes in 30 mil and 40 mil thicknesses, with the 40 mil version holding up better to foot traffic and mortar work during installation. It’s sold in pre-cut kits, including a 5×6 foot sheet with two corner dams, or in bulk rolls up to 100 feet for larger commercial jobs.
CPE liner is a different material, chlorinated polyethylene instead of PVC, and it’s the better pick if your shower has a radiant floor heating system underneath. CPE tolerates the heat cycling better than standard PVC over time. The tradeoff is that CPE needs a different bonding adhesive (Oateyweld instead of Oatey’s X-15) and costs slightly more per square foot.



Preformed pans, meaning fiberglass, acrylic, or composite bases you set in place instead of building a liner and mortar bed by hand, cost less in labor but limit your size and shape options. If you want a custom footprint, a curbless entry, or a linear drain along one wall, a PVC liner over a mortar bed remains the standard method for a tile shower.
Tools and Materials for a PVC Liner Installation
Before you start, gather everything so you’re not mid-project running to the hardware store with wet mortar setting up. Here’s the core list for a standard PVC liner install:
- Oatey PVC shower pan liner kit (sized to your shower, plus corner dams)
- Oatey X-15 bonding adhesive for PVC seams (use Oateyweld only for CPE liners)
- A clamping ring drain, such as an Oatey 130 Series tile shower drain
- Dry-pack mortar for the pre-slope and top mortar bed, or a pre-sloped foam kit like Oatey’s Perfect Slope
- Staple gun or hammer and roofing nails, for securing the liner to wall framing
- Utility knife, tape measure, marker, and a 4-foot level
- Silicone caulk for sealing penetrations
Skip felt paper entirely. Petroleum in felt paper reacts with PVC liner and can make it brittle and prone to cracking over time. Stick with the mortar and adhesive combination the liner manufacturer recommends.
Step-by-Step Shower Pan Liner Installation
This process assumes a standard alcove shower with a center drain. Linear drains and curbless designs follow similar steps but need product-specific instructions for the drain hardware.
Build the Pre-Slope and Set the Drain Base
Pour dry-pack mortar onto the subfloor, sloping it 1/4 inch per foot down toward the drain base. Don’t cover the drain flange itself; the mortar should stop right at its edge. Let the pre-slope cure according to your mortar’s instructions, usually 24 to 48 hours, before moving on.
If you’d rather skip the hand-troweled slope, a pre-sloped foam kit trims to size and installs faster, with a built-in center ring for the drain. It’s a solid option if you don’t have experience getting an even mortar slope on your first try.
Cut and Position the Liner
Measure your shower’s length and width, then add extra for the walls (the liner needs to run at least 5 to 8 inches up the studs on every side) and the curb. Lay the liner flat, mark your cuts using the 6 inch grid printed on the back, and cut with a utility knife.
Center the liner over the pre-slope with the factory folds facing up into the corners. Smooth it down without stretching it tight; the liner needs a little give so it doesn’t tear if the framing shifts slightly over time.
Seal the Corners and Curb
Fold the liner into each wall corner and staple it to the framing, staying above the finished mortar bed height so no staple holes sit below water level. Apply pan liner adhesive to the folded seams before stapling to bond the overlapping PVC together.
Cover the curb (the raised threshold at the shower entrance) with liner material cut to match its width and height, then adhere the corner dams where the curb meets the wall framing. These preformed corners seal a spot that’s notoriously hard to waterproof with flat sheet liner alone.
Connect the Drain and Cut the Weep Holes
Cut a hole in the liner directly over the drain opening, then set the liner into the drain’s lower flange. Install the clamping ring on top to lock the liner in place and create a watertight seal around the drain body.
Check that the weep holes around the drain’s edge stay clear of mortar or debris. These small holes let water that reaches the liner drain out through the weep system into your home’s plumbing, instead of sitting trapped on top of the liner.
Run a Flood Test Before Tiling
Plug the drain with a test plug, then fill the shower base with 2 inches of water. Leave it for 24 hours and check the ceiling below (if there is one) and the subfloor edges for any sign of leaking.
This is the single most important step in the whole process. A flood test catches a bad seam or a puncture in the liner before you’ve buried it under a mortar bed and thousands of dollars in tile.
Pour the Top Mortar Bed
Once the liner passes the flood test, mix and pour your final mortar bed at the same 1/4 inch per foot slope as the pre-slope layer. Screed it smooth and let it cure fully, typically 24 to 72 hours depending on temperature and humidity, before starting tile work.
How Much a Shower Pan Underlayment Costs in 2026
Material costs for a PVC liner installation stay fairly consistent across the country, but labor rates swing widely by region. Here’s what the numbers look like based on current pricing from major retailers and trade cost data.
| Item or Service | Typical Cost Range | What Affects the Price |
|---|---|---|
| PVC liner kit (5×6 ft, with corner dams) | $25 to $60 | Thickness (30 mil vs 40 mil), brand, kit size |
| CPE liner (for radiant floor showers) | $40 to $90 | Square footage, radiant heat compatibility |
| Bonding adhesive and mortar materials | $40 to $120 | Shower size, mortar bag count, adhesive brand |
| Clamping ring shower drain | $25 to $90 | Drain style, center vs linear, brand |
| DIY total (materials only) | $150 to $400 | Shower footprint, drain type, liner grade |
| Full pro installation (liner, mortar bed, drain) | $900 to $2,300 | Labor rates, shower size, subfloor condition |
How These Cost Ranges Were Determined
These figures come from comparing current retail pricing at Home Depot, Menards, and manufacturer sites for Oatey liner kits and drains, alongside trade labor cost data from Angi and Homewyse for 2026. The DIY material range reflects a standard 4×5 to 5×6 foot alcove shower with a center drain.
Professional installation costs vary more because labor makes up 40 to 60 percent of most shower projects, and hourly rates for tile setters and plumbers range from $45 to $150 depending on your region. Custom sizes, linear drains, and subfloor repairs push costs toward the higher end of the range. Treat these numbers as a starting point for budgeting, not a guaranteed quote for your specific bathroom.
Common Mistakes That Cause Liner Leaks
Stapling the liner below the finished mortar bed height is one of the most frequent errors. Every staple hole is a potential leak point, so any fastener needs to sit above where water will actually reach.
Skipping the flood test ranks as the second big mistake, and it’s an expensive one. A pinhole leak or a bad corner seam that goes unnoticed gets buried under mortar and tile, then shows up as a stain on a ceiling months later.
Using felt paper under or against the liner also causes long-term problems. The petroleum content breaks down the PVC over time, leading to cracking that wouldn’t happen with a proper mortar or adhesive setup.
When to Call a Plumber Instead of DIYing It
Call a licensed plumber if your shower needs a new drain line, if you’re changing the drain location, or if you find soft or rotted subfloor once you pull up the old shower base. Moving plumbing lines usually requires a permit and inspection in most jurisdictions, so check your local building department before cutting into anything.
A plumber or tile contractor is also worth the cost if you’ve never worked with mortar before. Getting an even 1/4 inch per foot slope by hand takes practice, and a lopsided pre-slope leads to standing water that never fully drains.
Shower Pan Underlayment vs Ready-to-Tile Foam Pans
Ready-to-tile foam shower pans, sold by brands like Schluter and QuickDrain, skip the mortar bed entirely. They come pre-sloped and waterproofed at the factory, and you tile straight onto the foam surface.
They cost more upfront than a PVC liner kit, often $200 to $500 for the pan alone, but they cut installation time significantly and remove the risk of an uneven hand-poured slope. A traditional PVC liner and mortar bed still wins for fully custom sizes, curbless designs, or shower footprints that don’t match a standard foam pan dimension.
Frequently Asked Questions
How long does a PVC shower pan liner last?
A properly installed 40 mil PVC liner typically lasts 20 to 30 years or longer, since it’s protected under the mortar bed and tile and never gets direct exposure to sunlight or foot traffic.
Can I install a shower pan liner over an old one?
No. You need to remove the old liner and mortar bed completely, since layering a new liner over damaged material traps existing water and mold underneath the new installation.
What size shower pan liner do I need?
Measure your shower floor, then add 8 to 12 inches on each side for the wall run-up and curb coverage. Most standard alcove showers fit a 5×6 foot liner kit, while larger or curbless designs need a bulk roll.
Do I need weep holes if I’m using a linear drain?
Yes. Linear drains still need a weep protection system built into the drain body, so water reaching the liner has a path out through the drain instead of sitting on the mortar bed.
Is a PVC liner or a foam shower pan better for a DIY project?
A foam pan is more forgiving for a first-time DIYer since the slope comes pre-built at the factory. A PVC liner costs less in materials but requires more skill to get the mortar slope and corner seams right.
Getting Your Shower Pan Underlayment Watertight
A correctly installed shower pan underlayment comes down to three things: a proper 1/4 inch per foot slope, sealed corners and curb, and a flood test before you tile. Skip any of those steps and you risk a leak that won’t show up until real damage has already happened.
Budget $150 to $400 in materials if you’re doing the liner yourself, or $900 to $2,300 if you’re hiring a pro for the full pan installation. Either way, the flood test stays non-negotiable. It’s the one step that tells you the waterproofing actually worked before it’s too late to fix cheaply.
