

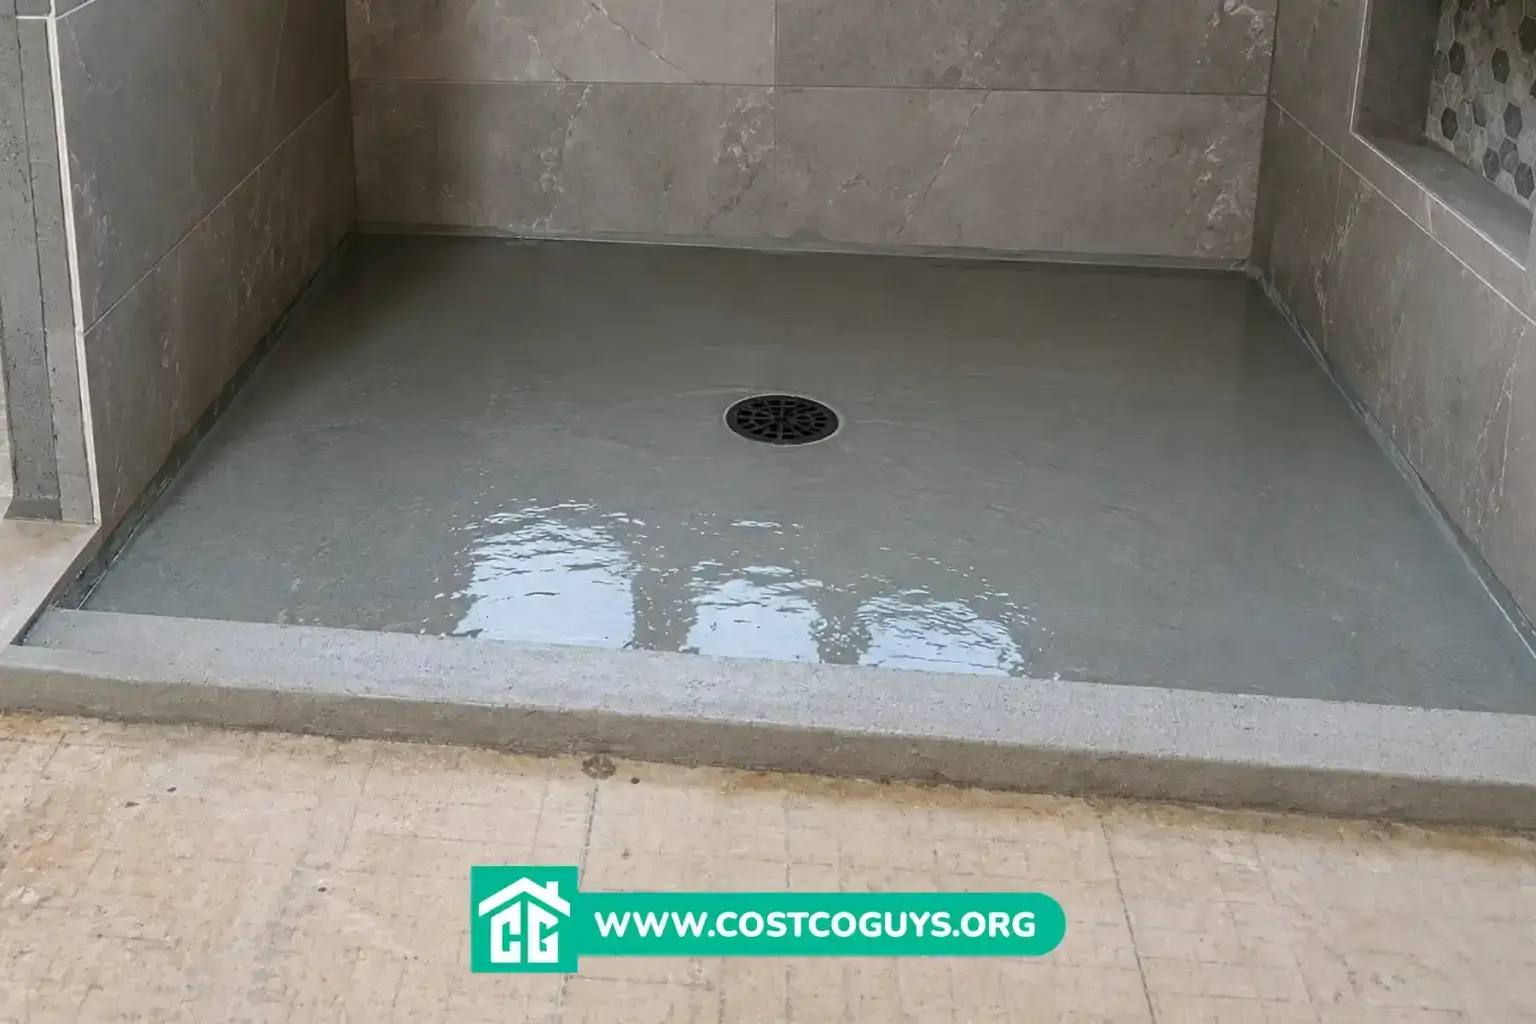

A pre-sloped shower base is a factory-built foam pan that already has the correct floor slope worked into it, so you skip building a mud bed by hand. Pan-only prices typically run $150 to $1,300 in 2026, depending on size, drain style, and brand.
- What Makes a Shower Base “Pre-Sloped”
- Center Drain vs Linear Drain Pre-Sloped Pans
- Pre-Sloped Shower Base Sizes and Fit
- Step-by-Step: Installing a Pre-Sloped Shower Pan
- Prep the subfloor.
- Dry-fit the pan and drain.
- Set the pan in thinset or the manufacturer’s adhesive.
- Install the drain body and flange.
- Waterproof the seams and curb.
- Flood test before tiling.
- Tile the shower floor and walls.
- How We Priced This Pre-Sloped Shower Pan Guide
- Common Mistakes That Cause Pan Leaks
- When to Call a Tile Pro Instead of DIYing It
- Picking the Right Pre-Sloped Shower Base for Your Remodel
- Pre-Sloped Shower Base FAQs
What Makes a Shower Base “Pre-Sloped”
Every shower floor needs a slope toward the drain, usually about a quarter inch per foot. That slope stops water from pooling on the tile after you shower. Builders used to create this slope by hand, packing a sand and cement mix called a mud bed onto the subfloor and shaping it with a screed board.
A pre-sloped shower pan skips that step. The pan arrives from the factory already shaped with the correct pitch, so you just set it in thinset mortar and tile straight over the top. Most pans use lightweight, high-density polystyrene foam, the same rigid foam family used in coolers, but pressed far denser so it can carry tile and foot traffic without flexing.
The good pans come with a waterproof coating or membrane already bonded to the foam at the factory. Look for one rated to ANSI A118.10, the industry test standard for bonded waterproof membranes under tile, and IAPMO PS-46, a plumbing standard that confirms the pan meets code for shower pan liners. Both show up on manufacturer spec sheets for Laticrete, Schluter, and Wedi products.
Center Drain vs Linear Drain Pre-Sloped Pans
Center drain pans slope down from all four sides toward one drain in the middle of the floor. Schluter’s Kerdi-Shower-T tray is a common center drain option, sold in sizes from 38 by 60 inches up to 72 by 72 inches. These work well in a standard rectangular or square shower stall.
Linear drain pans slope in one direction toward a narrow trench along one wall or through the center of the floor. Laticrete’s Hydro Ban Linear Pre-Sloped Shower Pan is one of the better known options here, sold in 34 by 66, 38 by 66, 44 by 66, and 50 by 66 inch sizes. Schluter and Wedi both sell their own linear versions too, under the Kerdi-Shower-LT and Fundo Riolito names.
Linear pans tend to look cleaner in a modern bathroom design because the drain sits flush along an edge instead of pulling your eye to the middle of the floor. They also make curbless, walk-in showers easier to build, since the slope only runs one way instead of four. The tradeoff is price. A linear pan and matching drain usually cost more than a same-size center drain kit.
Pre-Sloped Shower Base Sizes and Fit
Standard sizes cover most bathroom layouts, but exact fit still matters. Hydro Ban linear pans top out at 50 by 66 inches for stock sizing, and Schluter’s largest center drain tray runs 72 by 72 inches. If your shower opening falls outside those numbers, some manufacturers offer custom-cut options through a distributor, though lead times run longer and prices climb.
Most pans can also be trimmed on site with a straightedge and a fine-tooth saw if your rough opening runs a few inches smaller than the stock size. One installer on a trade forum described cutting three inches off two sides of a Hydro Ban pan on a table saw with a helper, then skim-coating the cut edges with thinset before tiling. That’s a normal adjustment, not a sign something’s wrong with the product.
Step-by-Step: Installing a Pre-Sloped Shower Pan
The install sequence stays fairly similar across brands, though you should always follow the specific manufacturer’s instructions for your kit.
Prep the subfloor.
The surface needs to be clean, flat, and structurally sound. Plywood or cement backer board both work as a substrate.
Dry-fit the pan and drain.
Set the pan in place without adhesive first to confirm the drain lines up with your existing rough plumbing.
Set the pan in thinset or the manufacturer’s adhesive.
Hydro Ban pans use a bonded sealant included in the kit; Schluter and Wedi pans typically bed into unmodified thinset mortar.
Install the drain body and flange.
The flange is the flat lip around the drain that seals to the pan; most kits need it sealed with the same waterproof sealant used elsewhere in the system.
Waterproof the seams and curb.
Tape or membrane strips cover the joints where the pan meets the walls and the curb, since a factory-sloped pan only protects the floor, not the wall-to-floor transition.
Flood test before tiling.
Plug the drain, fill the pan a couple inches deep, and let it sit 24 hours to confirm there’s no leak before you commit to tile.
Tile the shower floor and walls.
Once the flood test passes, tile goes on like any other shower installation.
| Item | Typical Cost Range | What Affects the Price |
|---|---|---|
| Basic center-drain foam pan | $150 to $450 | Size, brand, and whether the drain is included |
| Premium center-drain pan (Schluter Kerdi-Shower-T) | $350 to $700 | Pan size, retailer markup, shipping |
| Linear drain pre-sloped pan (Hydro Ban, Fundo Riolito) | $700 to $1,300 | Pan dimensions, linear drain length, freight cost |
| Matching linear or square drain body and grate | $150 to $450 | Grate style, drain length, brushed vs polished finish |
| Curb, sealant, and seam tape (if not included in kit) | $50 to $150 | Curb material, whether the pan kit already bundles it |
| DIY installation labor (your time) | $0 | A weekend project for most intermediate DIYers |
| Professional tile setter labor for full shower waterproofing | $1,400 to $2,400 | Local labor rates, shower complexity, curb vs curbless design |
A 34 by 66 inch Hydro Ban linear pan listed at $776.82 through one online tile supplier in 2026, which sits right in the $700 to $1,000 band you’ll see across most distributors for that size. Larger 50 by 66 inch versions push closer to the $1,200 to $1,300 mark once you add the matching drain.
How We Priced This Pre-Sloped Shower Pan Guide
These ranges come from current retailer listings at Floor & Decor, StoneTooling, and specialty tile suppliers, cross-checked against manufacturer spec sheets from Laticrete and Schluter. Full installed system costs, covering materials and labor for a complete waterproofed shower, come from a 2026 trade comparison published by a Massachusetts remodeling contractor, which put a full Schluter Kerdi system install between $2,550 and $3,350 and a comparable Wedi system between $2,500 and $3,200.
Your actual price depends on your region, the size of your shower, and whether you hire a tile setter or do the work yourself. Treat these figures as a planning range built from public pricing and trade sources, not a guaranteed quote for your specific project.
Common Mistakes That Cause Pan Leaks
Skipping the flood test is the single biggest mistake homeowners make. A pan can look perfectly sealed and still leak at the drain flange or a seam, and tile hides that problem until water shows up on the ceiling below.
Another common error is using the wrong sealant or mortar. Some pans need unmodified thinset because their factory coating won’t bond well with modified, latex-added mortar. Using the wrong type can cause the pan to shift or lose adhesion over time.
People also forget to waterproof the corners and the pan-to-curb transition. The pan handles the floor, but the seams where it meets the walls and curb need their own tape or membrane strip. That seam is the most common failure point in showers that leak within the first few years.
When to Call a Tile Pro Instead of DIYing It
A pre-sloped pan makes shower waterproofing far more approachable for an intermediate DIYer, since it removes the hardest part of a traditional install: shaping an accurate mud bed slope by hand. Setting the pan, connecting the drain, and running a flood test are all within reach for most homeowners who’ve done basic tile work before.
Call a licensed plumber if your drain needs to be relocated or if the rough-in plumbing doesn’t match your new pan’s drain placement. Call a professional tile setter if you’re dealing with a curbless design, a steam shower, or a layout with benches and niches, since those details add waterproofing steps that are easy to get wrong on a first attempt.
Picking the Right Pre-Sloped Shower Base for Your Remodel
A pre-sloped shower base saves time over a hand-built mud bed and gives you a factory-tested waterproof floor before you ever set a tile. Center drain pans from Schluter cost less and suit a standard shower stall, while linear pans from Laticrete or Wedi cost more but fit modern, curbless designs better. Expect to spend $150 to $450 for a basic center drain pan or $700 to $1,300 for a linear system, plus the drain and any curb hardware not already bundled in the kit.
Whichever pan you pick, don’t skip the flood test. It’s the one step that tells you the shower is actually watertight before the tile goes down and the pan disappears from view for good.
Pre-Sloped Shower Base FAQs
Can I install a pre-sloped shower pan myself?
Yes, most intermediate DIYers can install one in a weekend. The main steps are dry-fitting the pan, setting it in thinset or the kit’s sealant, connecting the drain, and running a flood test before tiling.
Do pre-sloped pans work with any tile?
Yes. Once the pan is bonded and flood tested, it accepts porcelain, ceramic, or natural stone tile the same way a traditional mud bed does. The pan only replaces the slope and waterproofing layer underneath.
How long does a pre-sloped shower pan last?
Manufacturers like Laticrete back their Hydro Ban pans with a lifetime system warranty when installed as part of the full Hydro Ban product line. Actual lifespan depends heavily on correct installation, especially at the seams and curb.
What size pre-sloped shower pan do I need?
Measure your rough shower opening first, then compare it against stock sizes like Schluter’s 38 by 60 inch or Laticrete’s 34 by 66 inch pans. Many pans can be trimmed down a few inches on site if your opening runs smaller than the stock size.
Is a linear drain pre-sloped pan worth the extra cost?
It depends on your design goals. A linear pan suits curbless, walk-in showers and modern bathroom layouts better than a center drain pan, but it typically costs a few hundred dollars more once you add the matching drain.
