
A shower pan waterproofing guide really comes down to three choices: liquid membrane, sheet membrane, or a traditional PVC liner under a mortar bed. Most homeowners in 2026 spend between $300 and $1,200 in materials alone, depending on which system they pick and how big the shower is.
- What a Shower Pan Actually Has to Do
- Liquid Membrane vs Sheet Membrane vs PVC Liner
- Step-by-Step Shower Pan Installation Process
- Common Mistakes That Cause Leaks Later
- How These Cost and Method Estimates Were Reached
- When to Call a Professional Instead of DIYing It
- Maintaining Your Waterproof Shower Long Term
- Shower Pan Waterproofing Guide: Choosing the Right System
- Frequently Asked Questions
- What is the best way to waterproof a shower pan?
- Can I use liquid waterproofing membrane on the whole shower, including the floor?
- Do I need a shower pan liner if I use a liquid or sheet membrane?
- How long does shower pan waterproofing take to cure before tiling?
- What causes most shower pan waterproofing failures?
What a Shower Pan Actually Has to Do
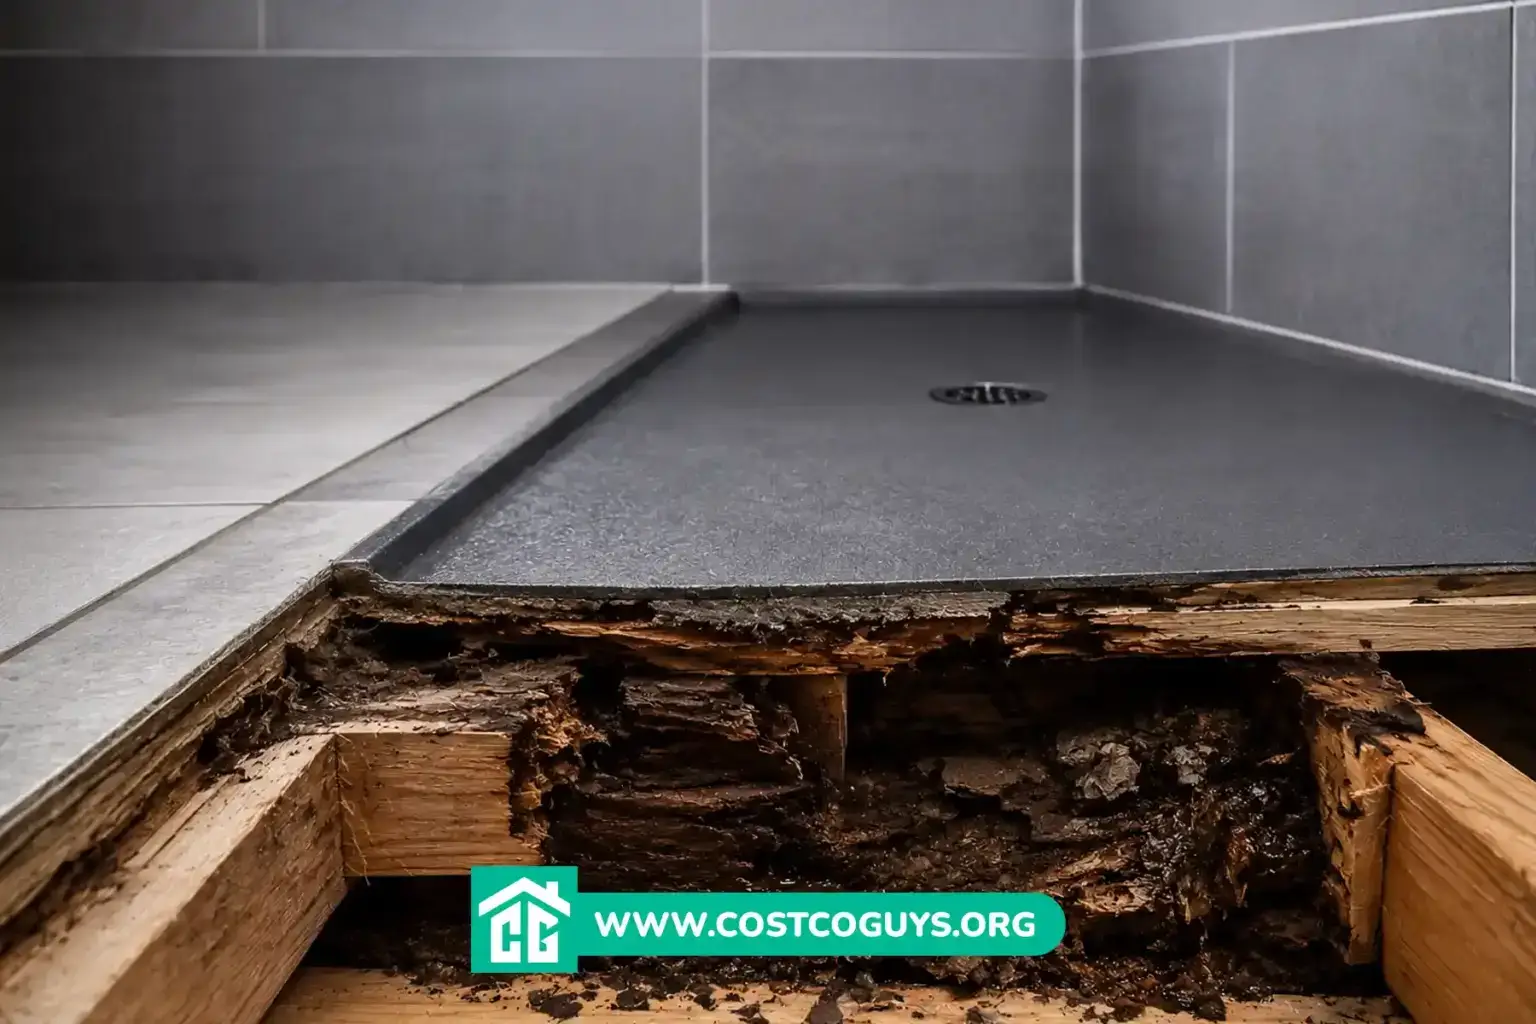
Your shower pan is the waterproof base underneath the tile floor. Tile and grout look solid, but they’re not waterproof on their own. Water gets through the grout lines every single time you shower. The pan is what stops that water from reaching the subfloor and the framing below it.
A waterproof membrane sits directly beneath the tile layer to catch whatever water makes it through. Without one, that moisture soaks into plywood and studs. Within a year or two, you’re looking at rot, mold growth, and a much bigger repair than the one you started with.
This applies to the walls of your shower too, not just the floor. Water vapor moves through tile and grout on vertical surfaces just like it does underfoot. A complete waterproofing system covers the base and walls together, with extra reinforcement at the corners and at the shower drain.
Liquid Membrane vs Sheet Membrane vs PVC Liner
Liquid waterproofing membrane goes on like thick paint. Brands like RedGard and HydroDefense get rolled or brushed directly onto cement backer board in two coats, with a 12 to 24 hour cure between coats. It’s the easiest waterproofing method for a DIYer because it uses a skill most people already have.
Sheet membrane, the kind Schluter sells under its Kerdi line, comes pre-cut to a consistent thickness and bonds to backer board with thinset mortar (a cement-based adhesive used under tile). Tile setters tend to prefer it because the thickness never varies, and there’s nothing to wait on before tiling.


PVC and CPE liners are the old-school approach. The liner gets installed beneath a mortar bed, with the sloped layer underneath built up before the liner goes down. Water that gets past the tile drains across the liner into weep holes at the base of the drain. It’s still the standard for traditional mortar-bed shower pans, and some plumbers still favor copper shower pan liners for high-end custom work, though copper costs noticeably more and needs a specialist to solder the seams.
| Waterproofing Method | Material Cost (per sq ft) | Best Fit |
|---|---|---|
| Liquid membrane | $0.50 to $0.80 | DIY projects, walls, niches, irregular shapes |
| Sheet membrane | $1.20 to $1.80 | Larger showers, consistent thickness, faster tiling |
| PVC/CPE liner | $0.60 to $1.00 | Traditional mortar-bed pans |
None of these numbers include labor. A professional installation typically adds $40 to $90 per hour depending on your region, and a standard shower floor runs anywhere from 9 to 16 square feet, so labor alone can land between $400 and $1,000 for a straightforward stall.
Step-by-Step Shower Pan Installation Process
Shower waterproofing follows five stages: substrate preparation, backer board installation, membrane application, corner and seam treatment, and drain connection sealing. Skipping any one of them is how leaky shower problems start months after the tile goes up.
Start by stripping the shower area down to bare studs if you’re doing a full tear-out. Check every stud for plumb with a level, and replace anything warped. The framing needs to be flat, because tile backer board doesn’t bend to match a crooked wall.
Next, confirm the subfloor or mortar base slopes toward the drain at a minimum of 1/4 inch per foot. This pre-slope matters because flat floors trap standing water against the membrane instead of moving it to the drain.
Install your cement backer board, then apply your chosen membrane. For liquid systems, that means two even coats with a wet-film gauge to check thickness. For sheet systems, that means cutting pieces to fit and setting them in thinset with proper overlap at every seam.
Reinforce every inside corner and every spot where the wall meets the pan with waterproofing tape or a pre-formed corner piece. This is where most DIY shower pan installation jobs actually fail. The corners flex slightly every time someone steps in or out, and an unreinforced seam cracks open over time.
Finally, connect the membrane to the shower drain using a bonding flange or clamping ring, depending on your drain type. The membrane needs to overlap the drain assembly completely. A gap here sends water straight into the subfloor no matter how good the rest of your waterproofing job looks.
Common Mistakes That Cause Leaks Later
Skipping corner reinforcement tape is the single most common mistake, and it’s also the fastest route to a callback for professional installers. The corners and the drain connection see more stress than any flat surface in the shower.
Applying a second coat of liquid membrane before the first one cures is another frequent error. Trapped moisture between coats weakens the whole layer, even if the surface looks dry on top. Manufacturers list specific cure times for a reason, and rushing past them defeats the purpose of the extra coat.
Uneven thickness causes thin spots that fail under normal use. A single pinhole in a liquid membrane can let through roughly a gallon of water a day. Trapped behind tile against a wood floor joist, that volume of water can cause real rot in under six months.
Mixing waterproofing systems on the same surface is another problem worth avoiding. Combining a liquid membrane with a sheet system on the same wall can void the warranty from both manufacturers, since neither one tested compatibility with the other product.
How These Cost and Method Estimates Were Reached
These figures come from comparing material pricing across several manufacturer and trade sources, including Custom Building Products, Laticrete, and Schluter, alongside contractor pricing guides published in 2025 and 2026. Labor estimates reflect typical hourly rates reported by tile installers in mid-sized U.S. markets, not a single confirmed national average.
Your actual cost depends on shower size, regional labor rates, whether you’re doing a full tear-out or working with existing framing, and which brand of membrane your local supplier stocks. Treat these ranges as a starting point for budgeting, not a guaranteed quote.
When to Call a Professional Instead of DIYing It
Hire a licensed tile contractor if your shower has a curbless design, a bench, multiple niches, or a frameless glass enclosure. Every added detail is another seam or corner where waterproofing can fail, and the margin for error shrinks fast on complex layouts.
Call a plumber first if you’re moving or replacing the shower drain itself. The membrane bonding shower drain connection has to match your specific drain type exactly, and a mismatched fitting undermines the entire waterproofing system no matter how well the rest of the job goes.
DIY liquid membrane work makes sense on a standard rectangular shower with no curb modifications and a drain you’re keeping in place. If you’ve never worked with thinset mortar before, sheet membrane installation has a steeper learning curve and is worth handing to a professional.
Maintaining Your Waterproof Shower Long Term
Re-caulk the corner where the shower pan meets the wall tile once a year, even with a properly installed membrane underneath. Caulk is a cosmetic seal, not the waterproofing layer, but a cracked bead lets water sit against the grout line longer than it should.
Watch for grout discoloration near the drain or in corners. Dark staining in those specific spots often signals a slow leak in the membrane below, while general grout wear across the whole floor is usually just age and doesn’t point to a waterproofing failure.
Shower Pan Waterproofing Guide: Choosing the Right System
A shower pan waterproofing guide always comes back to matching the system to the shower design. Liquid membrane works well for straightforward stalls and DIY budgets. Sheet membrane suits larger or more detailed showers where consistent thickness matters more than ease of application. PVC liners remain the standard choice under a traditional mortar-bed pan. Whichever system you choose, the corners, the drain connection, and proper cure time decide whether the install lasts twenty years or fails in two.
Frequently Asked Questions
What is the best way to waterproof a shower pan?
The best way to waterproof a shower pan depends on your skill level and shower design. Liquid membrane works best for DIY projects on standard stalls, while sheet membrane suits larger showers with niches, benches, or curbless designs where consistent thickness matters more.
Can I use liquid waterproofing membrane on the whole shower, including the floor?
Yes, liquid membrane can cover both the floor and walls of a shower, but it requires careful attention to thickness. Uneven application on the floor, where foot traffic and standing water cause the most stress, is one of the more common reasons liquid systems fail.
Do I need a shower pan liner if I use a liquid or sheet membrane?
No, a separate PVC shower pan liner is only needed for traditional mortar-bed pans. Bonded membrane systems, whether liquid or sheet, run continuously from the walls down across the shower floor and into the drain flange, replacing the liner entirely.
How long does shower pan waterproofing take to cure before tiling?
Liquid membranes typically need two coats with 12 to 24 hours of cure time between each one, plus additional time before tiling begins. Sheet membranes can usually be tiled over once the thinset holding them in place has set, which is faster overall.
What causes most shower pan waterproofing failures?
Most failures start at the corners and at the shower drain connection, not on the flat surfaces of the pan. Skipping reinforcement tape at inside corners or leaving a gap where the membrane meets the drain assembly are the two most common causes.