
Setting up smart lighting at home involves choosing compatible devices, installing smart bulbs or smart switches, connecting them to your network, and configuring automation through apps. Most setups take 30-60 minutes per room and can save you up to $225 annually on energy bills while adding convenience and security to your home.
- How to Set Up Smart Lighting at Home
- Assess Your Current Setup and Requirements
- Choosing the Right Hardware and Ecosystem
- Installation Steps: Bulbs, Switches, Hubs, and Wiring
- Configuring Software, Automation, and Scenes
- Ensuring Security, Privacy, and Reliable Connectivity
- Troubleshooting Common Issues
- Cost, Energy Savings, and Practical Examples
The intelligent lighting market has exploded in 2025, with over 180 Matter-certified bulb models now available. You no longer need to worry about compatibility issues between brands. Modern automated lighting systems work with multiple voice assistants and can automatically adjust color temperature throughout the day.
How to Set Up Smart Lighting at Home
Smart lighting setup starts with planning your needs and ends with enjoying automated lighting that responds to your voice commands and daily routines.
The basic lighting installation process involves four main steps. First, assess your current electrical setup and lighting needs. Second, choose compatible hardware that works with your preferred smart home ecosystem. Third, install the physical components safely. Fourth, configure the software and automation features.
Most people complete their first room in under an hour. The hardest part is usually deciding which features you actually need versus which ones sound cool. Start simple and expand later as you discover what works for your lifestyle.
Assess Your Current Setup and Requirements
Check your existing wiring before buying anything. Most smart switches need a neutral wire, though innovative no-neutral alternatives now exist for older homes.


Turn off power at the breaker and remove a light switch plate to look inside. You should see black (hot), white (neutral), and green or bare copper (ground) wires. If you only see two wires, you might need smart bulbs instead of smart switches. Some newer smart switches work without neutral wires, but they cost more and have limited dimming capabilities. Modern lighting solutions like the Lutron Caseta or GE Cync switches use wireless lighting control technology to bypass this requirement.
Consider which rooms need smart home illumination most. Start with frequently used spaces like living rooms, bedrooms, and kitchens. Outdoor security lighting also provides excellent value. Motion sensors work particularly well in hallways, bathrooms, and garages where you often enter with full hands.
Choosing the Right Hardware and Ecosystem
The Matter standard has revolutionized lighting automation compatibility in 2025. Over 300 companies now support Matter, with ABI Research estimating more than 5.5 billion Matter-compliant devices will be shipped by 2026.
Smart bulbs offer the easiest installation but cost more per bulb. Smart lights now cost $2.24 to $90.35, with an average of $42. They work in any standard socket and provide color changing, dimming, and scheduling features. However, traditional lighting switches can turn them off completely, breaking smart functionality. Smart switches control multiple bulbs at once and maintain normal switch operation, but require electrical installation.
Choose WiFi for simple setups with 1-5 devices. Select Zigbee or Thread for larger installations with 10+ devices, as these mesh networking protocols provide better reliability. The Matter standard works with all major voice assistants including Alexa, Google Assistant, and Siri without choosing sides.
Consider LED light strips for accent lighting behind TVs or under cabinets. They use minimal power and create dramatic visual effects for entertainment areas. Connected home technology has made these lighting controls more affordable and easier to integrate.
Installation Steps: Bulbs, Switches, Hubs, and Wiring
Installing Smart Bulbs and Fixtures
LED smart bulbs install exactly like regular bulbs. Turn off the power, remove old bulbs, and screw in the new ones. Download the manufacturer’s app and follow the setup instructions.
Most smart bulbs use QR codes for quick pairing with Matter-compatible systems. Simply scan the code on the bulb packaging with your phone’s camera. The bulb automatically connects to your IoT lighting network and appears in your home automation apps.
Test each bulb after installation. Turn the wall switch on and leave it on – you’ll control the bulbs through apps and voice assistants instead. Some bulbs include backup manual light controls through rapid switch toggling.
Replacing or Installing Smart Switches and Dimmers
Smart switches require basic electrical work. Installation costs now range from $108-228 per switch in 2025. Turn off power at the circuit breaker and verify it’s off with a voltage tester before touching any wires.
Remove the old switch and note wire connections. Connect the black wire to “Line” or “Hot,” white wire to “Neutral” (if present), green or bare copper to “Ground,” and the wire going to lights to “Load.” Many smart dimmers include wire nuts and detailed instructions with diagrams.
For homes without neutral wires, no-neutral smart switches use innovative technology to circumvent the need for a neutral wire through capacitive or bypass technology. Install the switch in the wall box, attach the cover plate, and restore power. Modern smart switches often include setup instructions on the device screen itself.
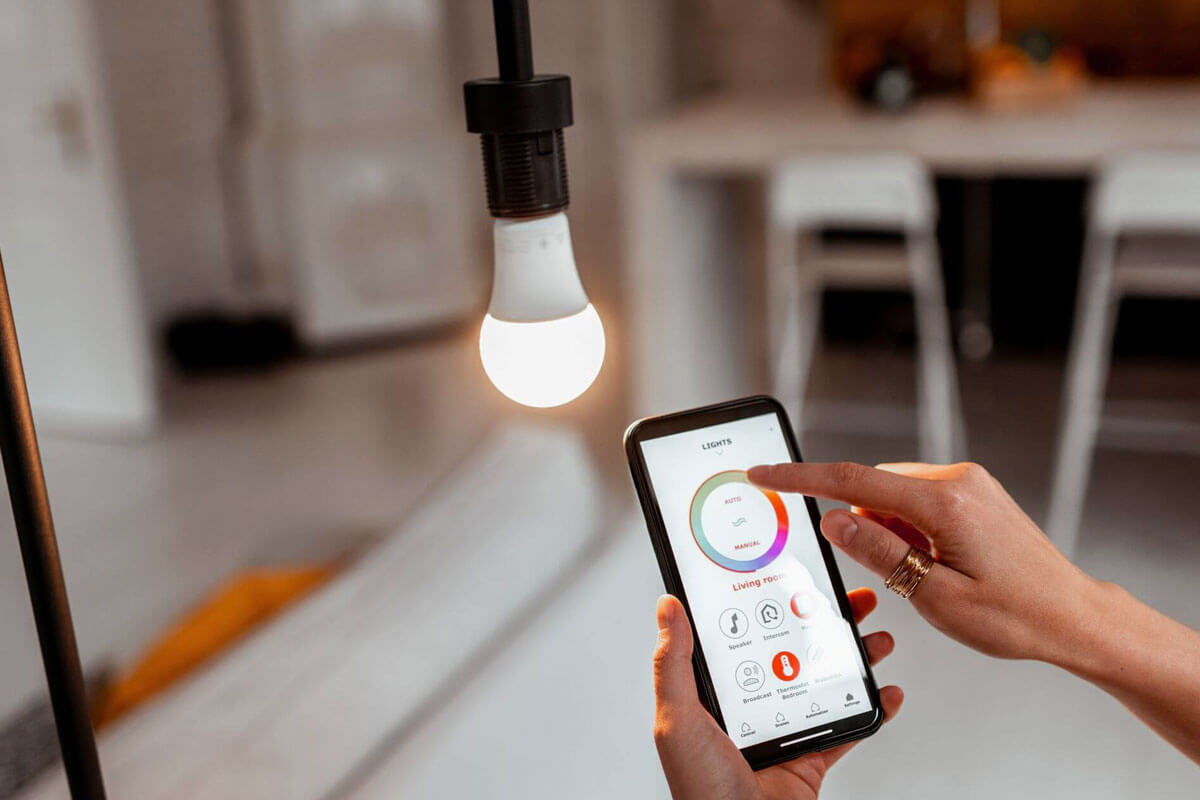
Configuring Software, Automation, and Scenes
Download your device manufacturer’s app first, then add devices to your preferred home automation systems platform like Apple Home, Google Home, or Amazon Alexa.
Create smart lighting configuration scenes for different activities. “Movie time” might dim lights to 20% and change to warm colors. “Cooking” could set kitchen lights to bright white. “Bedtime” gradually reduces brightness and shifts to warmer tones over 30 minutes.
Set up motion sensors to turn lights on automatically when you enter rooms and off when you leave. Configure schedules so lights turn on at sunset and off at your typical bedtime. Energy efficiency features can automatically adjust brightness based on natural daylight levels.
Geofencing turns lights on when you arrive home and off when everyone leaves. This intelligent lighting setup feature alone can save $50-75 annually on electricity costs.
Ensuring Security, Privacy, and Reliable Connectivity
Change default passwords on all devices immediately after installation. Recent security research shows smart light bulbs can be hacked to infiltrate home networks and steal personal data. Use strong, unique passwords for each device and enable two-factor authentication where available.
Choose devices that support local control without internet connections. The Matter standard emphasizes local control, meaning your lights still work during internet outages. Researchers recommend connecting smart bulbs to a smart home hub rather than directly to WiFi networks to reduce vulnerability to hackers.
Update firmware regularly to patch security vulnerabilities. Smart bulbs are vulnerable to hacking due to lack of encryption, weak authentication protocols, firmware vulnerabilities, and insecure communication channels. Enable automatic updates if available, or check monthly for new versions.
Set up a separate guest network for smart devices to isolate them from computers and phones containing sensitive information. This creates a barrier between your IoT lighting network and personal data.
Troubleshooting Common Issues
Lights not responding usually indicates network connectivity problems. Check your WiFi signal strength in the problem area. Smart bulbs need strong signals, and thick walls or distance from routers cause issues.
For Zigbee or Thread devices, add more devices to strengthen the mesh network. Each powered device (not battery-operated) extends the network range. Smart switches and plugged-in devices work as repeaters in your connected home technology setup.
Flickering lights often result from incompatible dimmers or overloaded circuits. LED bulbs require different dimmer controls than incandescent bulbs. Check that your smart switches are rated for LED loads.
Reset devices by following manufacturer instructions if they become unresponsive. Most require holding buttons for 10-30 seconds. Re-add them to your network afterward.
Cost, Energy Savings, and Practical Examples
Smart lighting costs more upfront but saves money long-term through energy efficiency and longevity. LED bulbs use 75-90% less energy than incandescent bulbs and last 25-50 times longer, with the average household saving $225 annually by switching to LED lighting.
Smart lighting installation costs now range from £3,000 to over £10,000 for whole-house systems, while basic room setups cost under £60. Smart bulbs add automation and convenience while maintaining these savings. Even accounting for standby power usage (about $1.50-4 per bulb yearly), the net savings remain substantial.
A typical living room conversion costs $150-300 for smart bulbs or $200-400 for smart switches, depending on complexity. You’ll recover costs within 18-24 months through energy savings and reduced bulb replacements.
Security benefits add value too. Automated light installation that responds to schedules and motion sensors deters break-ins more effectively than timers. Insurance companies sometimes offer discounts for comprehensive home automation systems including smart lighting.
Bottom line: Smart lighting setup takes minimal time and technical skill while delivering immediate convenience and long-term savings. The intelligent lighting setup process has evolved from complex installations to user-friendly systems that even beginners can master. Start with one room, learn the basics, then expand throughout your home as needs and budget allow. With advanced illumination technology becoming more affordable and secure, there’s never been a better time to upgrade from traditional lighting to smart solutions.
Note: The term “smart” originates from Old English “smeart” meaning quick or clever, perfectly describing these intelligent lighting systems that learn and adapt to your needs. In this context, “smart” refers to the technology’s intelligence rather than its stylish appearance, though modern fixtures certainly offer both attributes.